Setting Up Local Instance of Tomcat (JSP)
Pre-requisites
- Java 8 (JDK not required).
Install Eclipse for Java EE developers
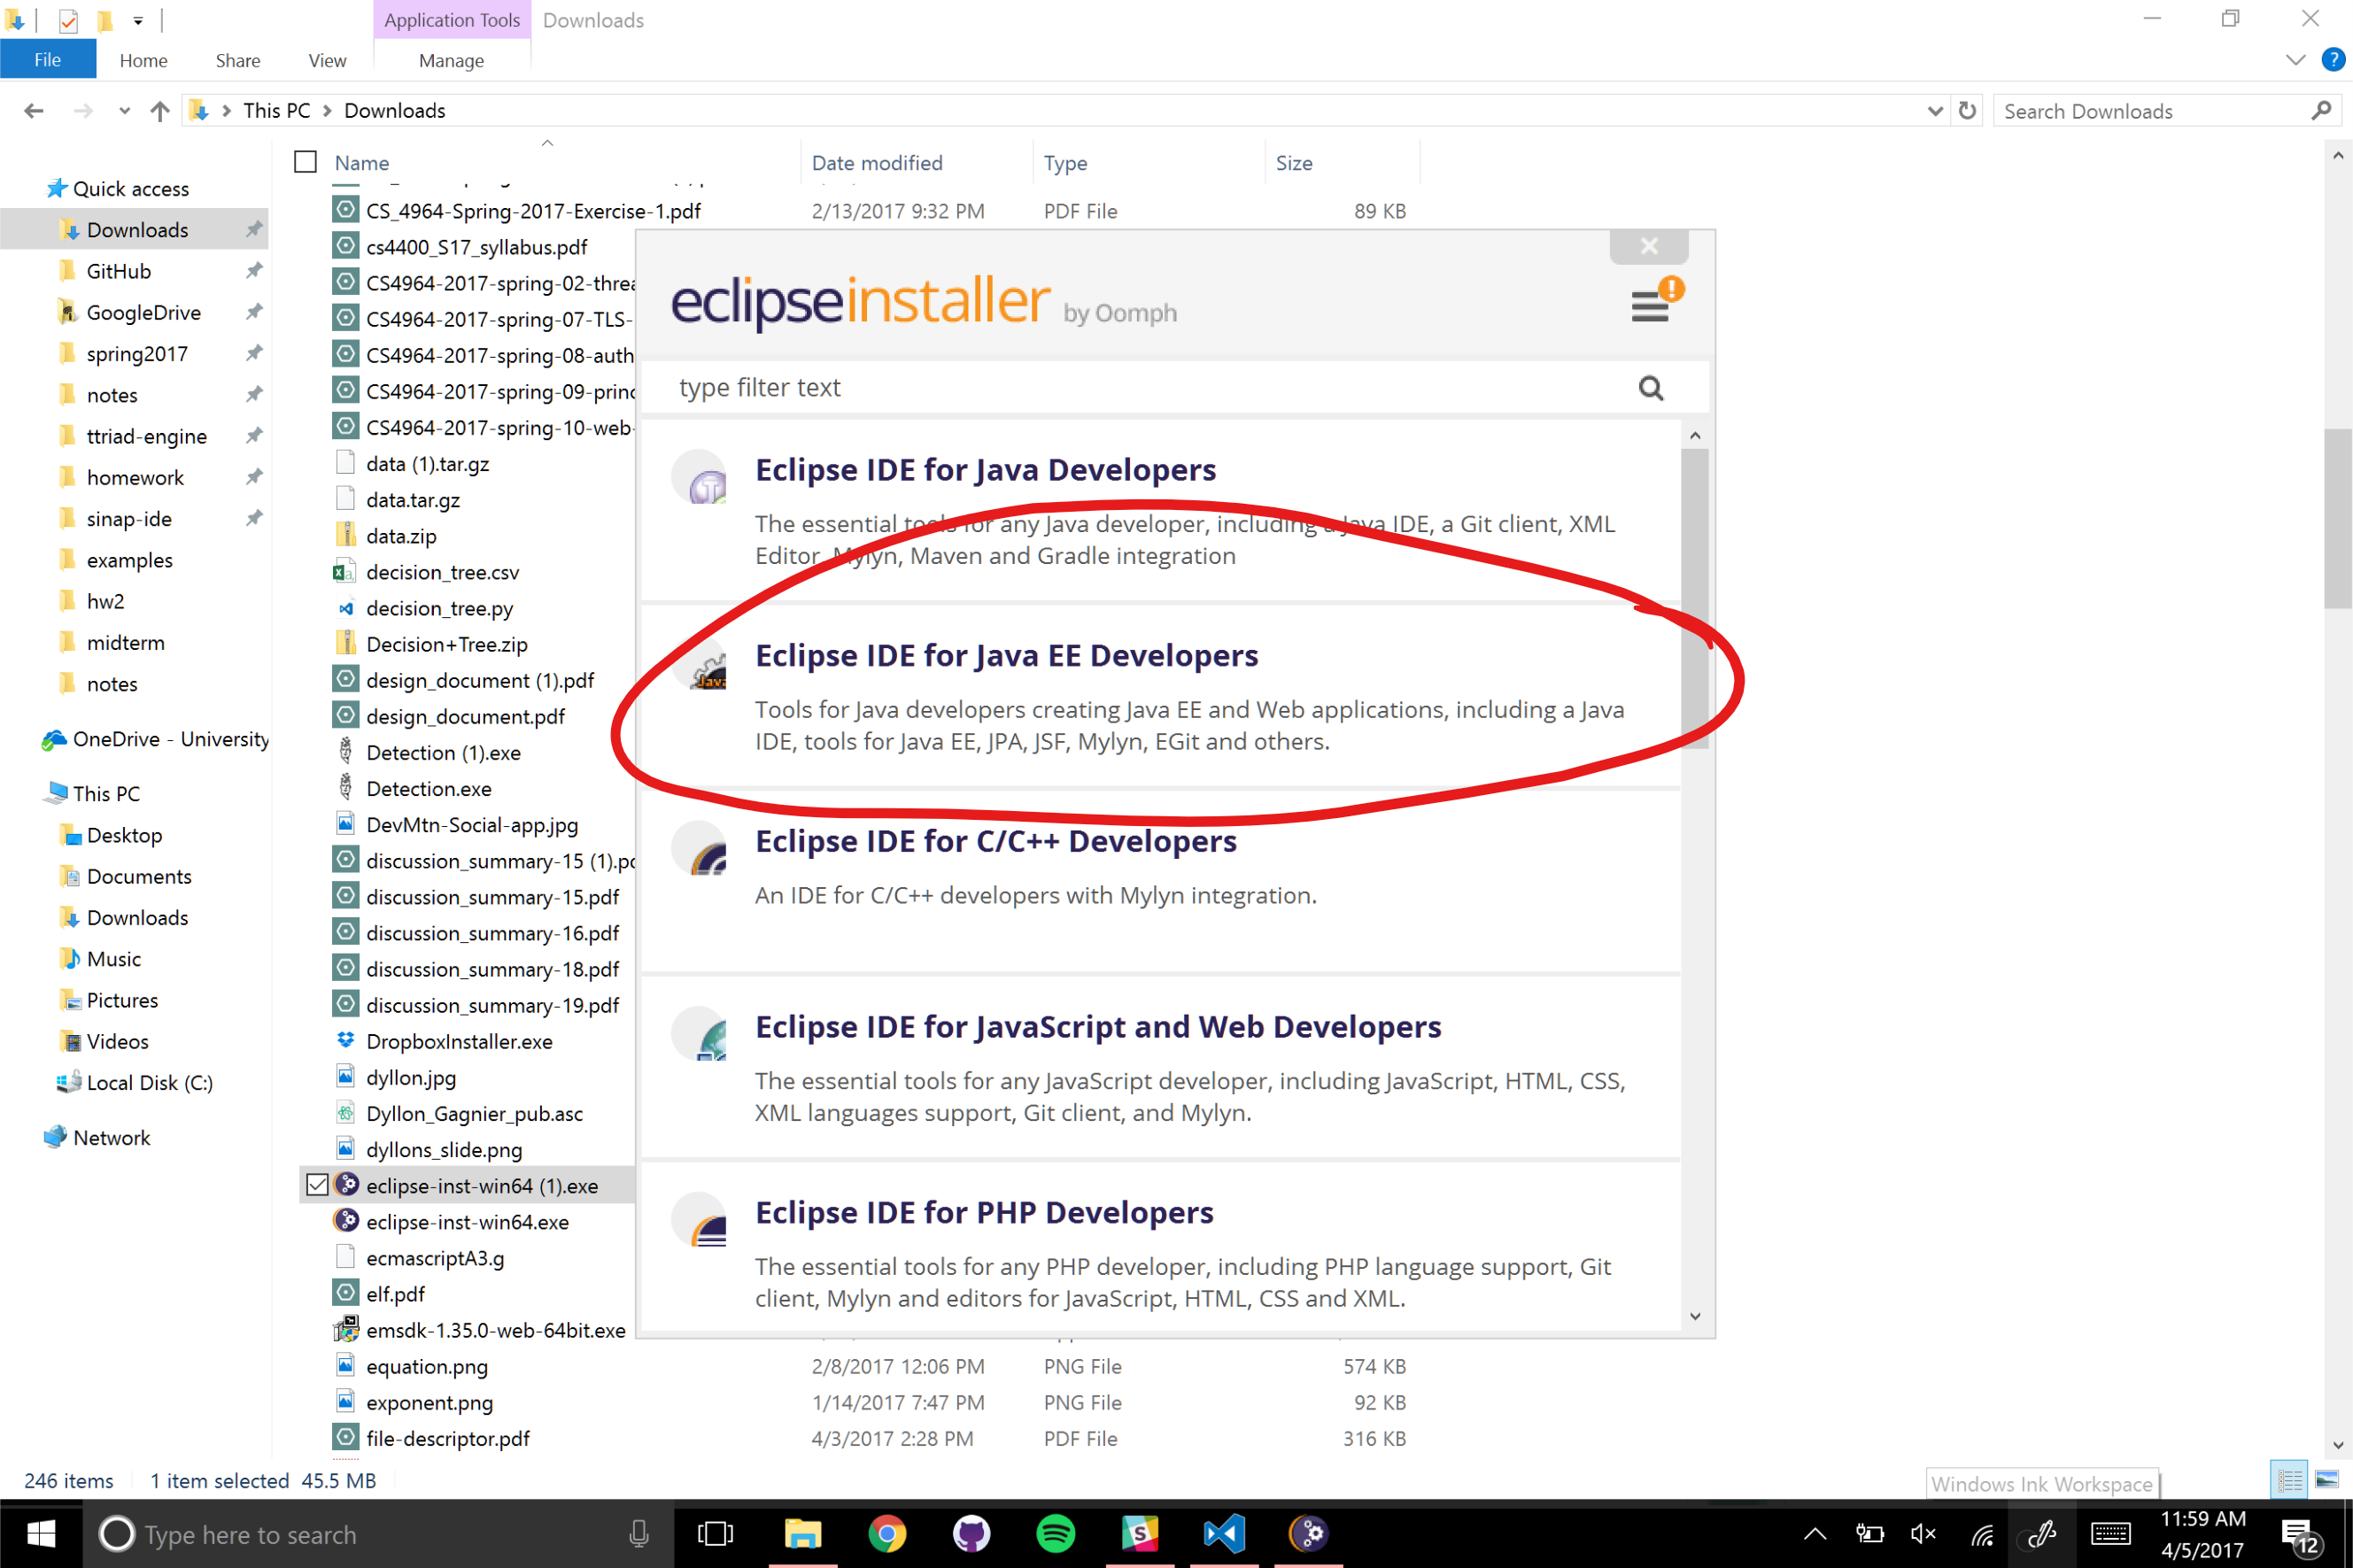
Make sure to install Eclipse for Java EE developers even if you already have another version of Eclipse installed. This version includes many useful plugins for web development that are difficult to install correctly from the base version of Eclipse.
Download and set up Tomcat
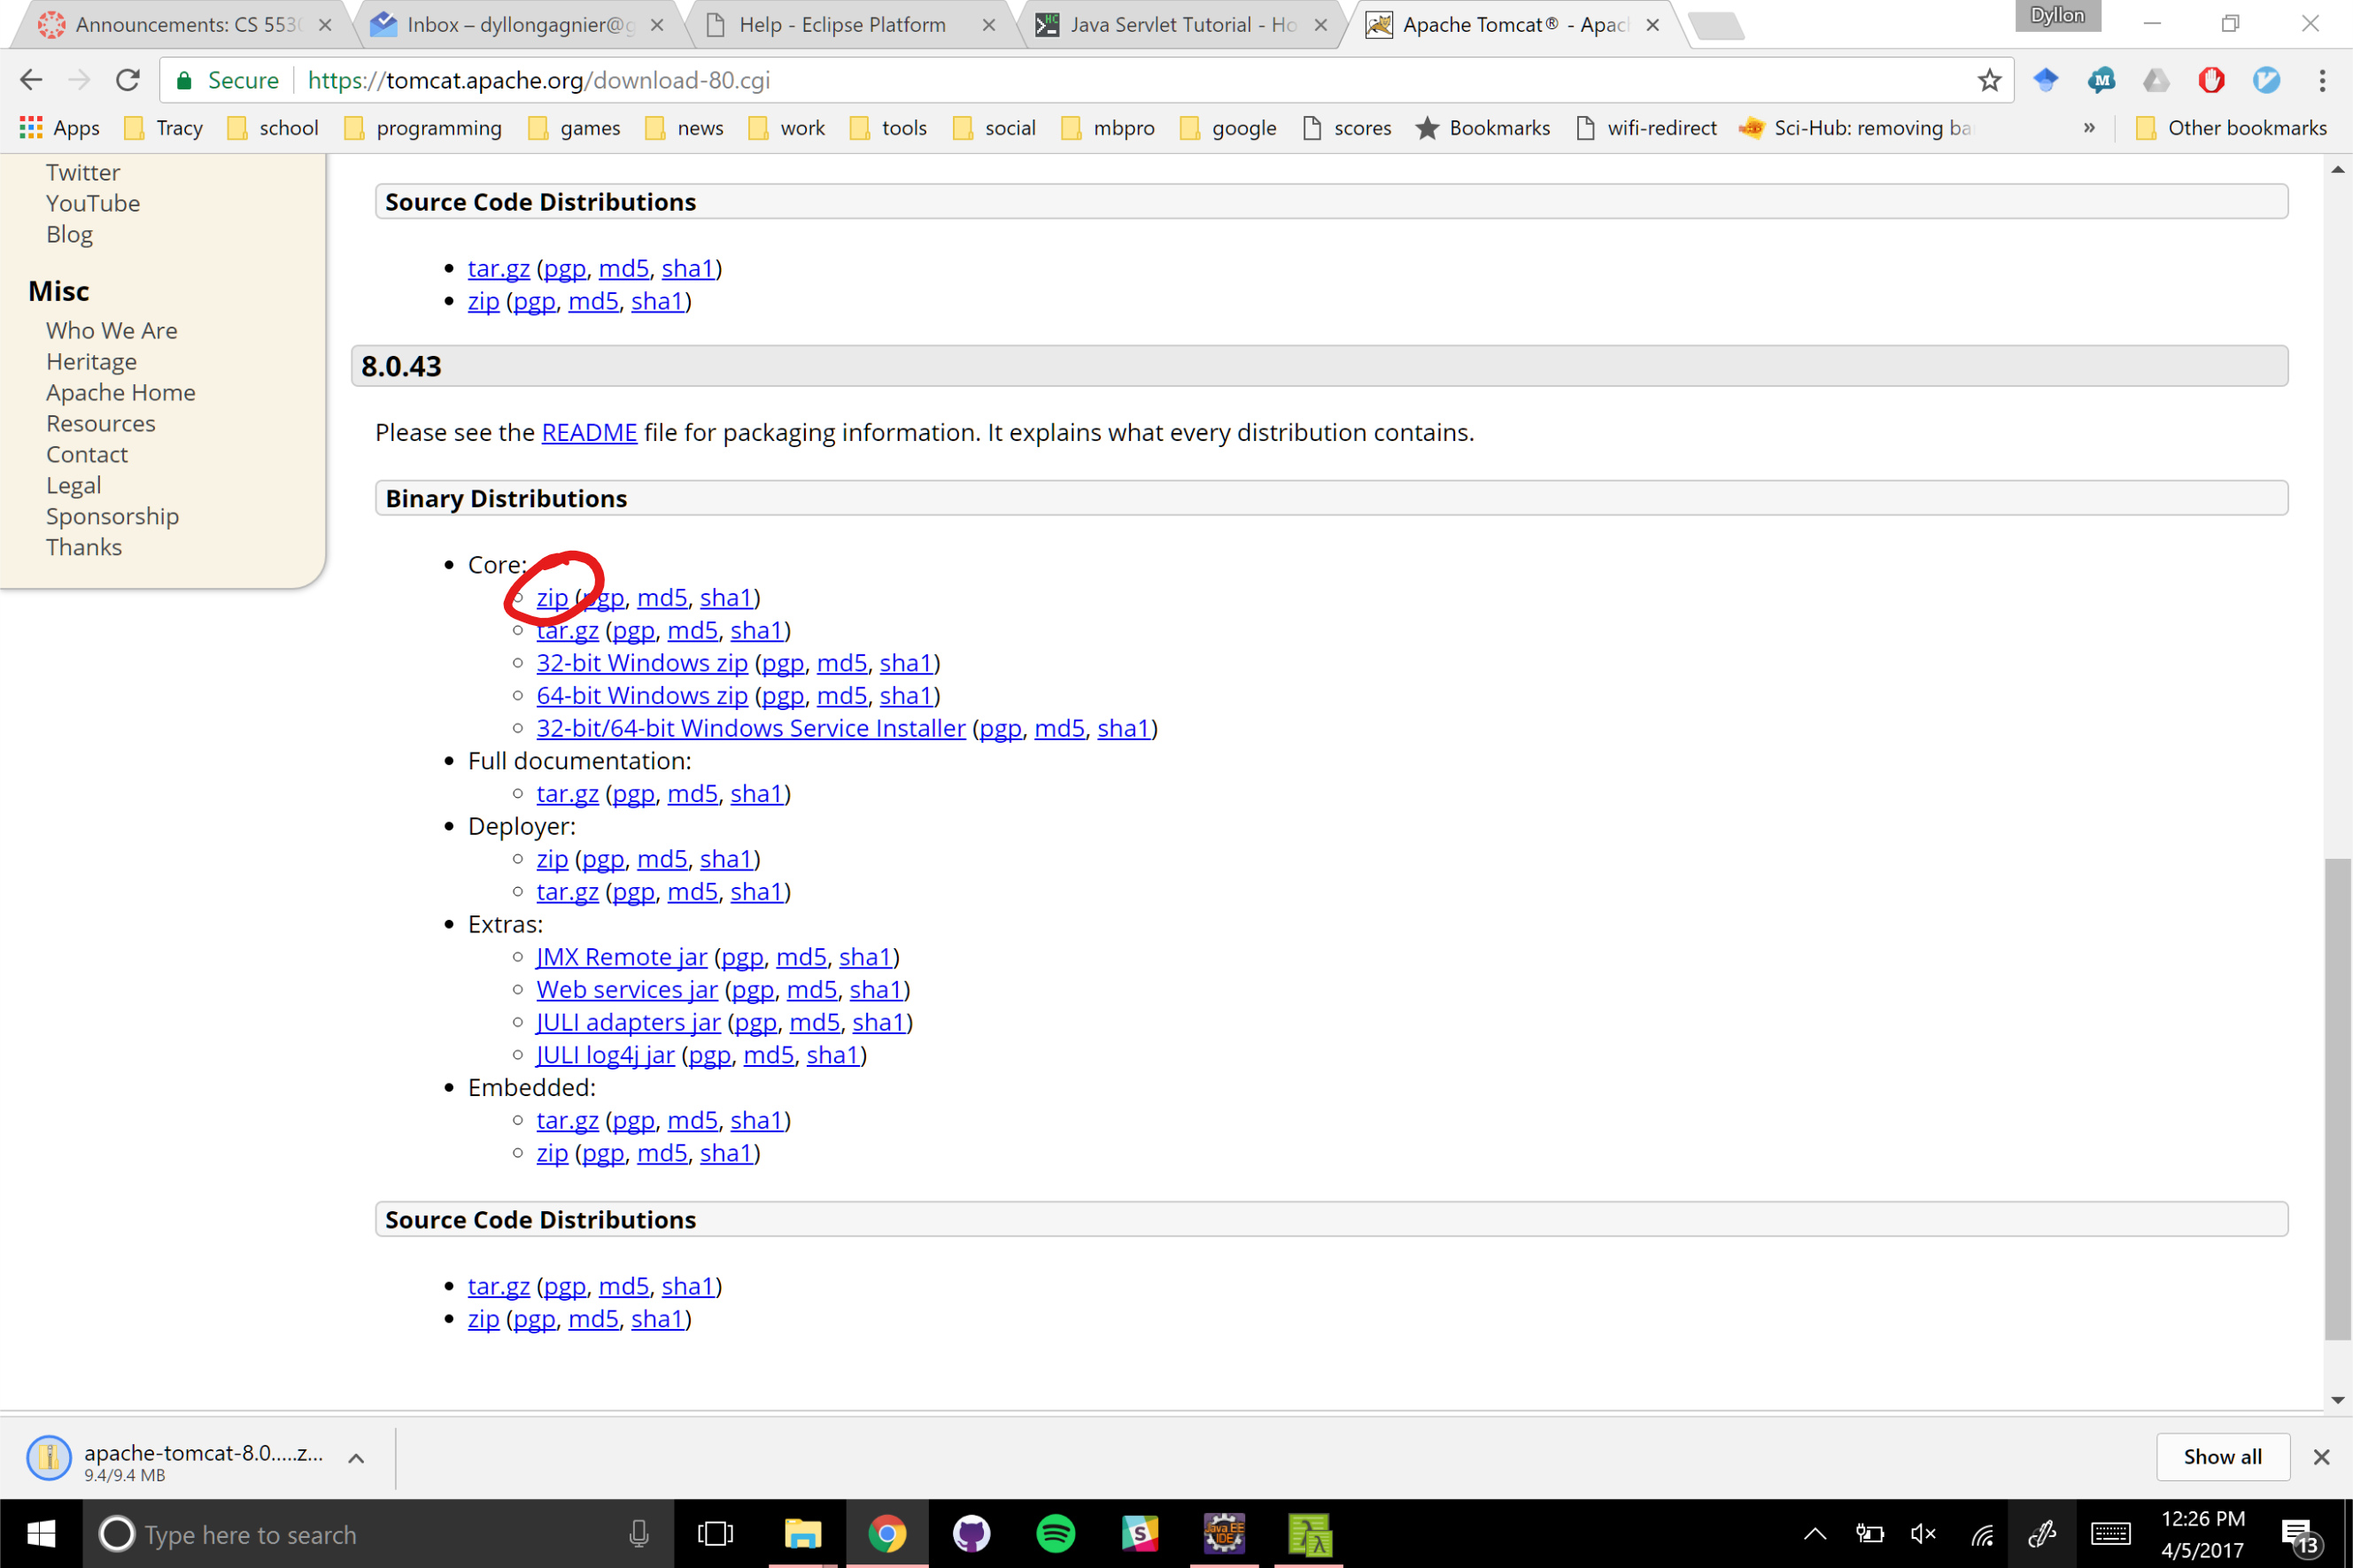
Go to Tomcat’s web page and download the latest version of Tomcat. Be sure to extract this zip file to a suitable location such as ProgramFiles on Windows since it must remain in one location to work with Eclipse.
Create a new project

Create a new project with the keyboard shortcut CTRL+n. Then, be sure to create a “Web/Dynamic Web” project NOT a regular Java project.
Set up and select a new target runtime
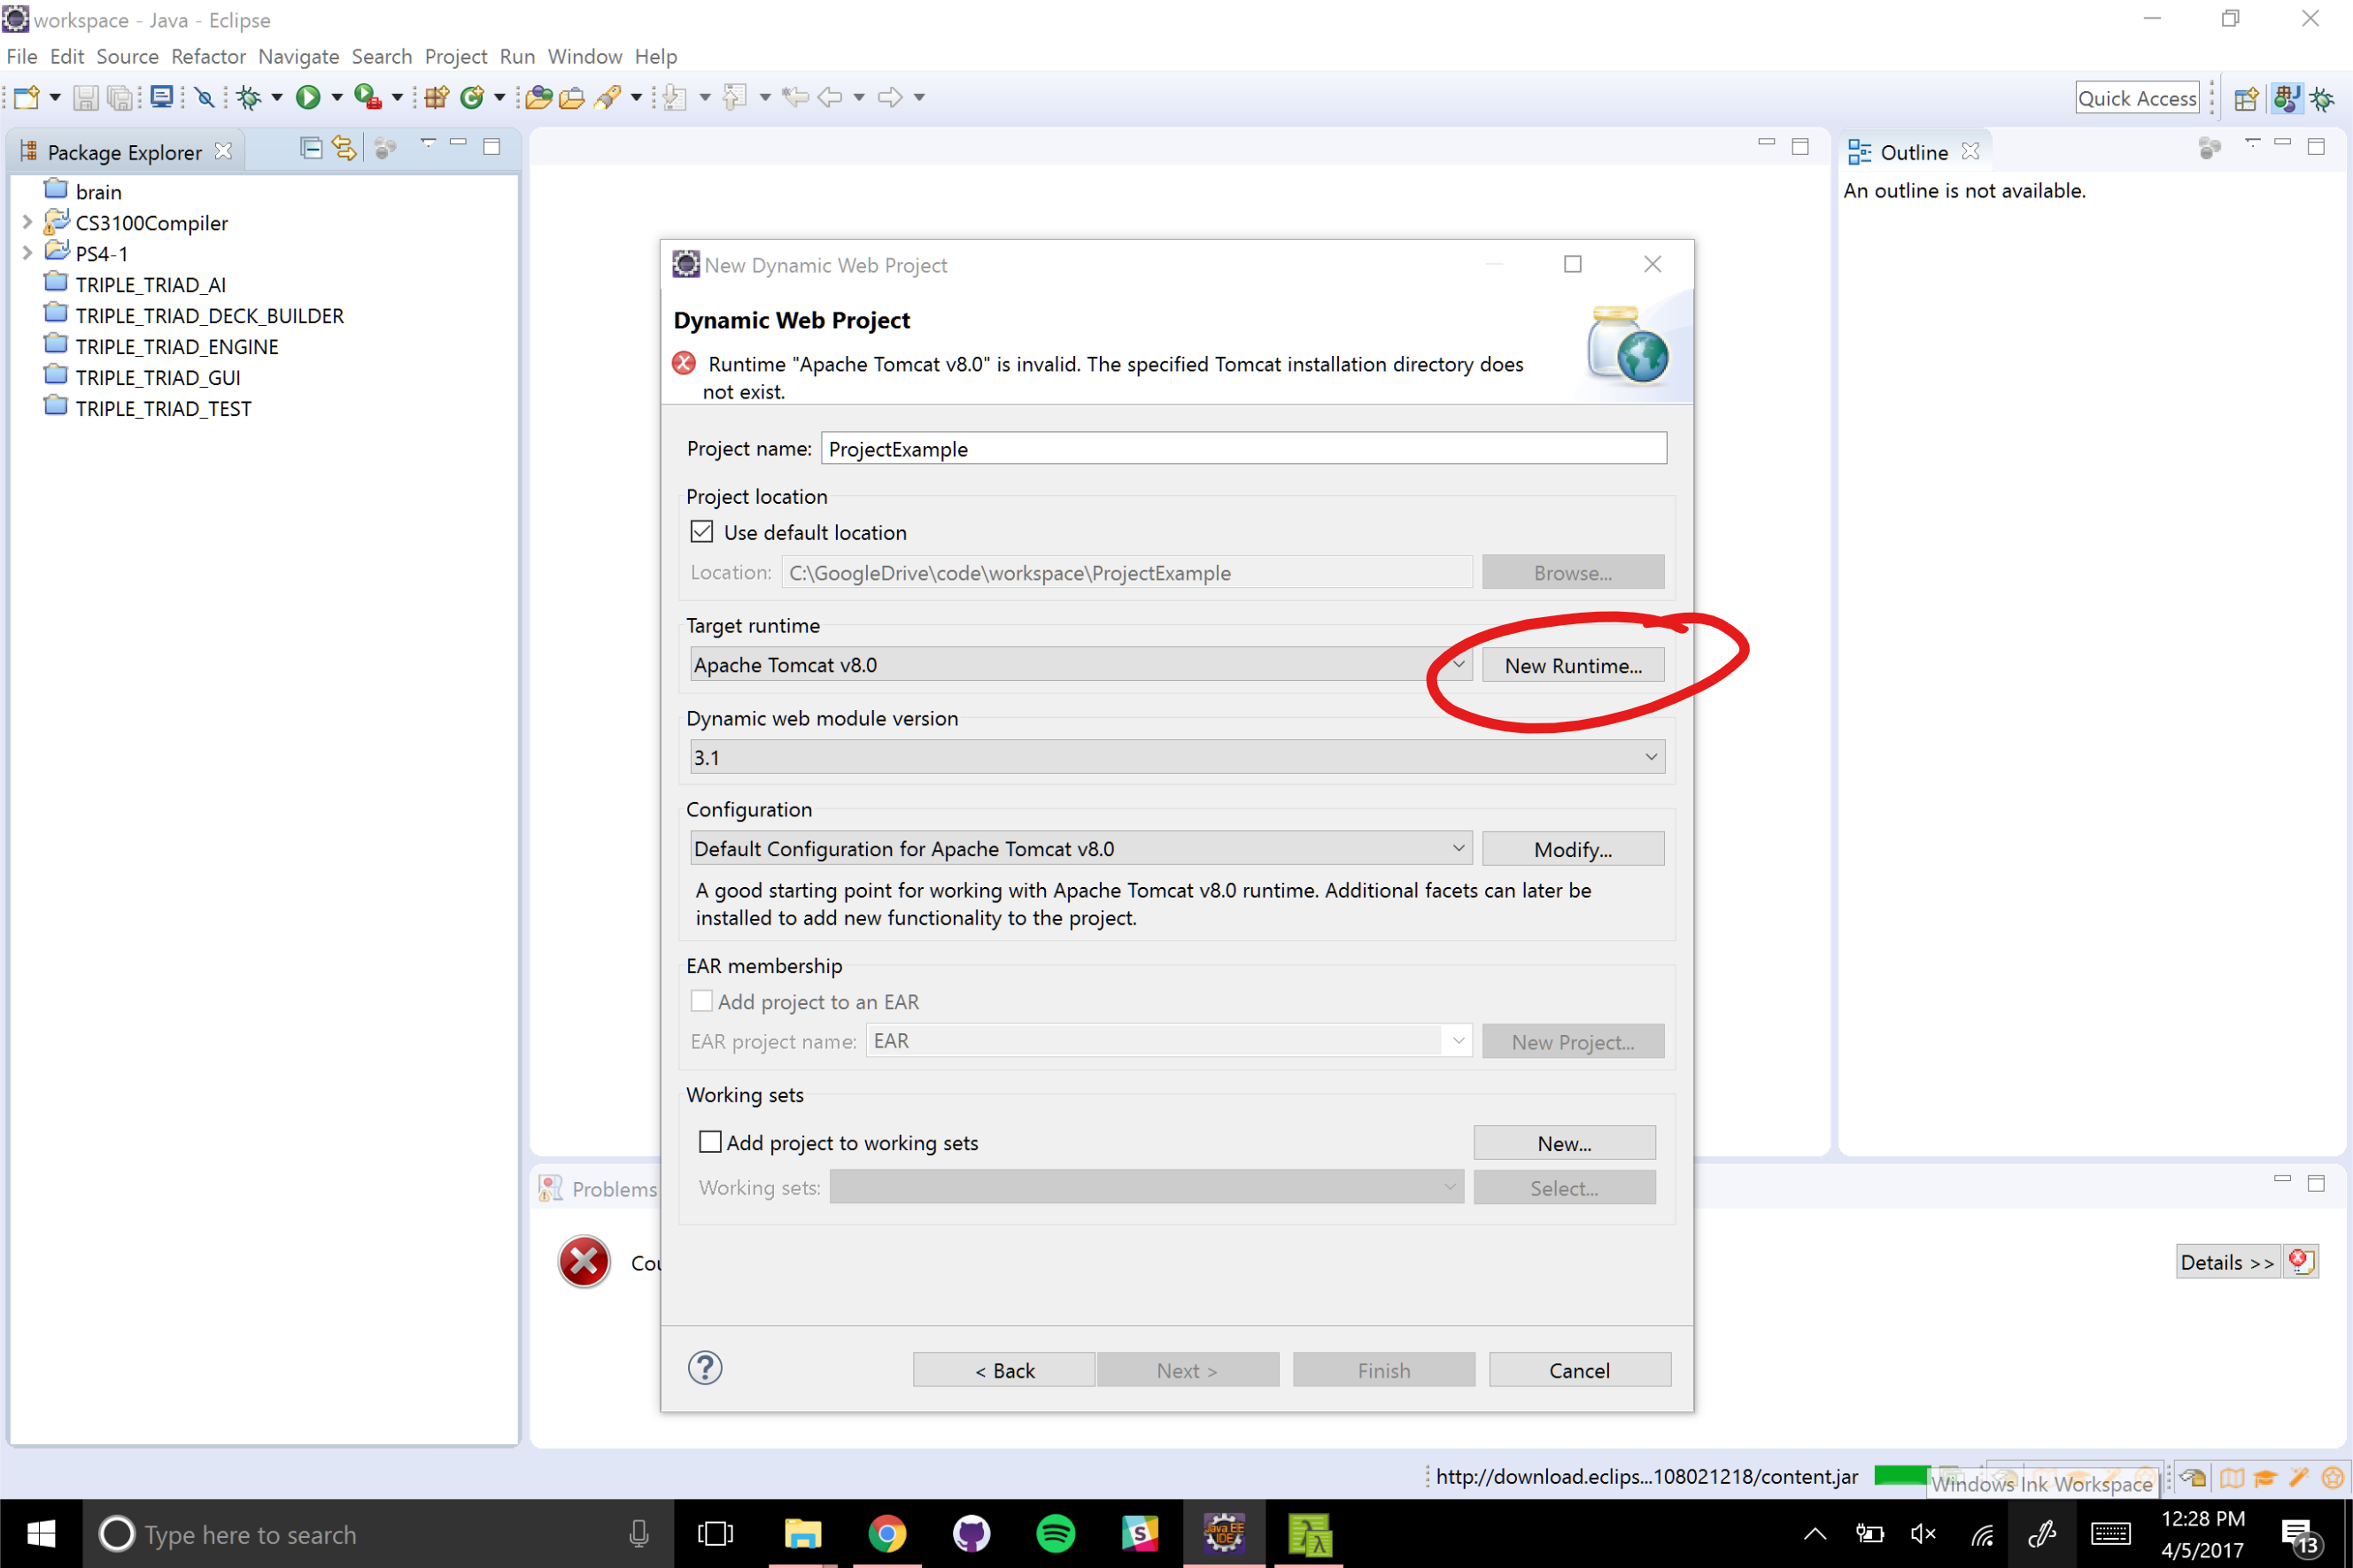
After selecting to create a new project, click “Next”. Select to create a new runtime which will allow you to configure Eclipse to use your downloaded version of Tomcat.
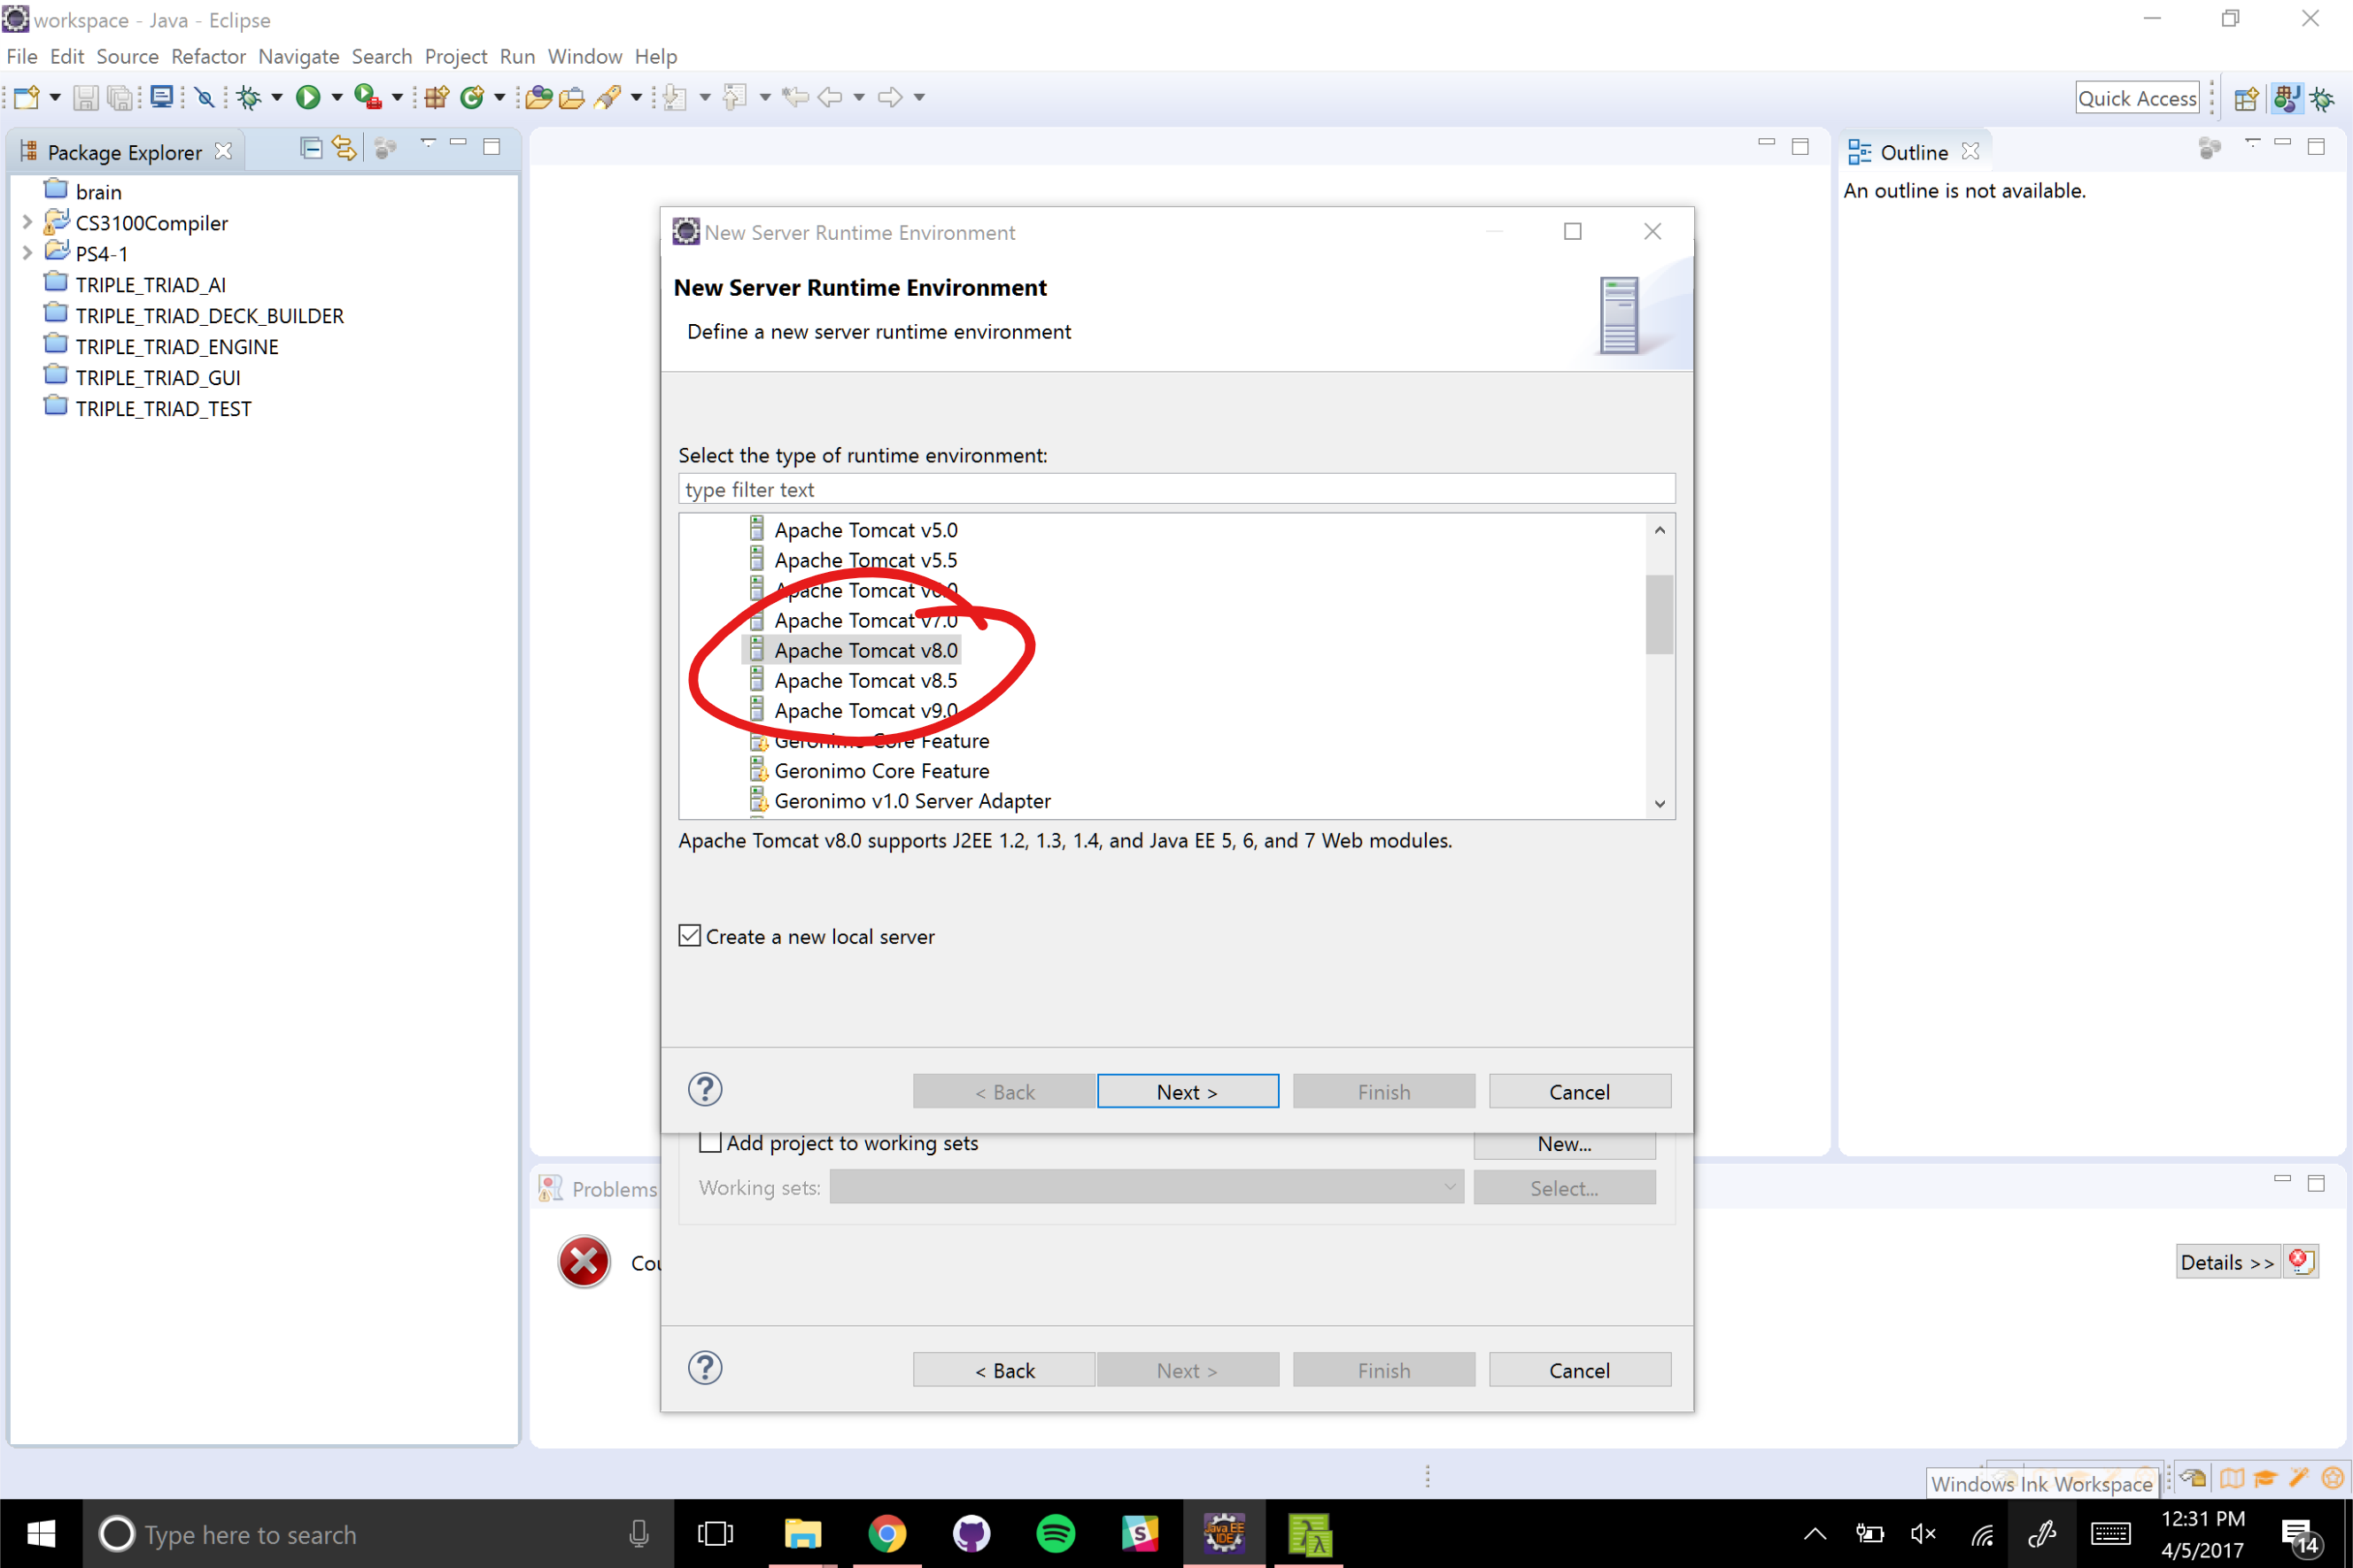
Select a matching version of Tomcat in the GUI.
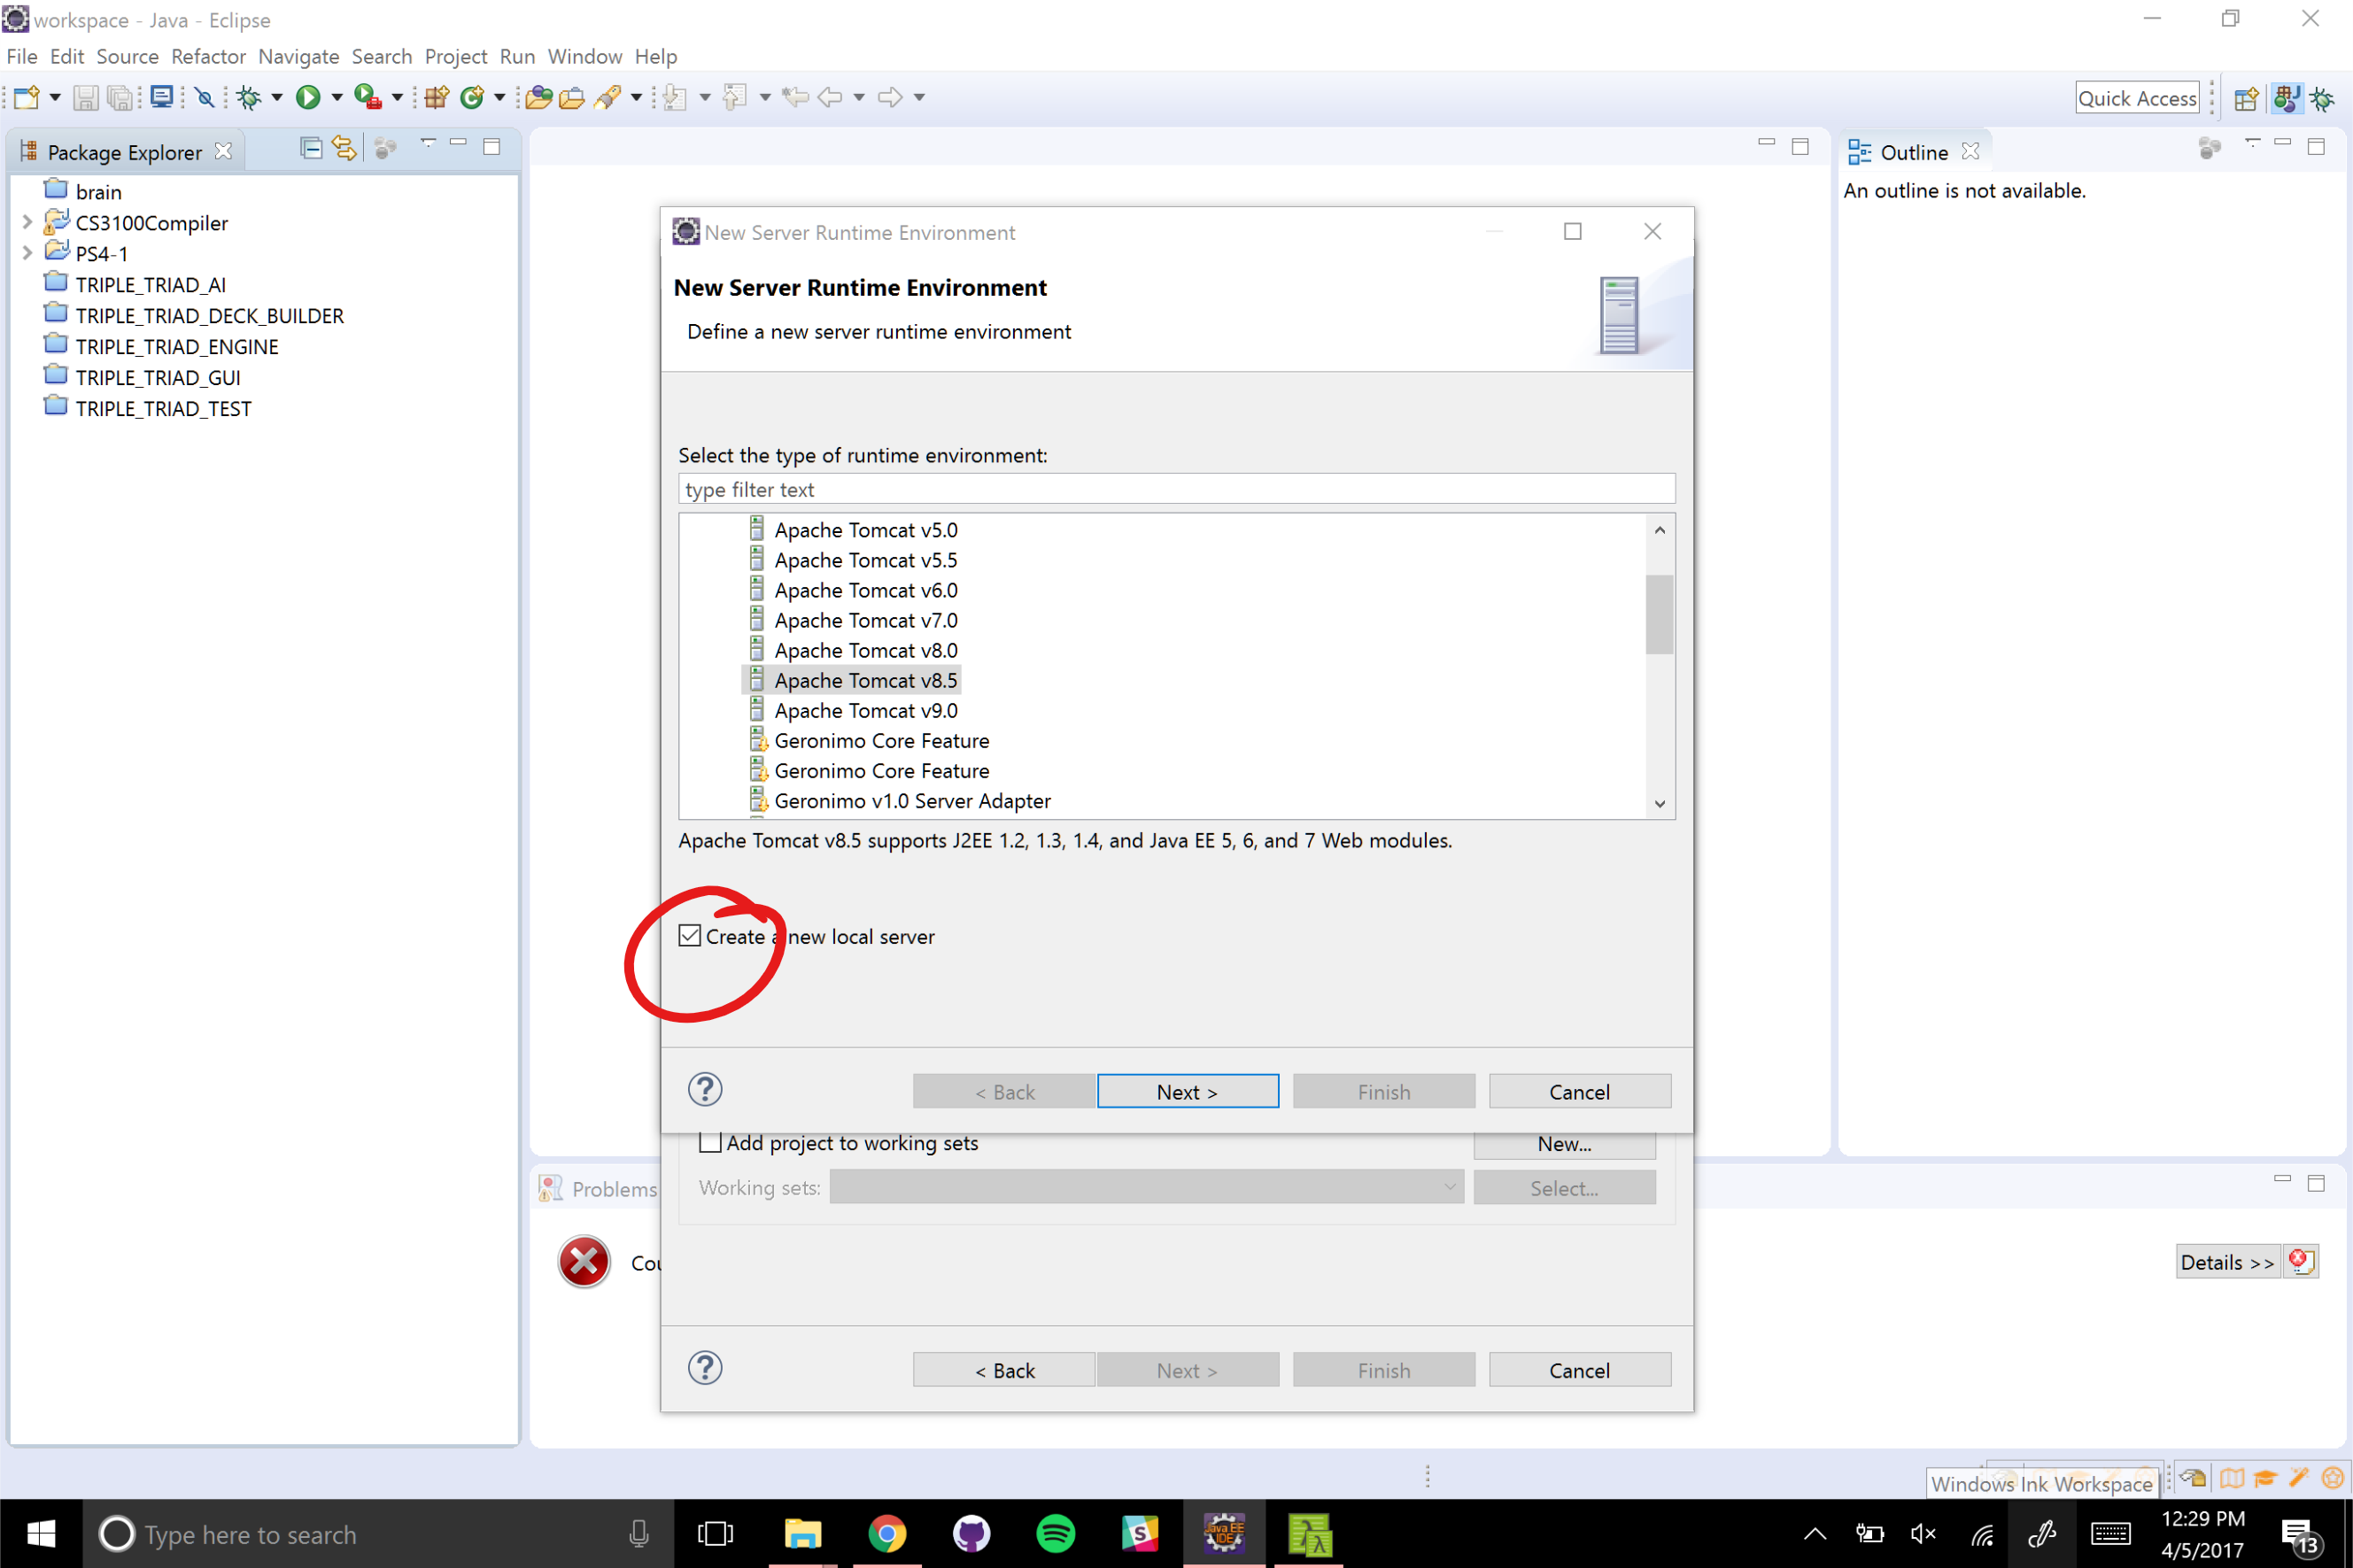
Select to create a new local server.
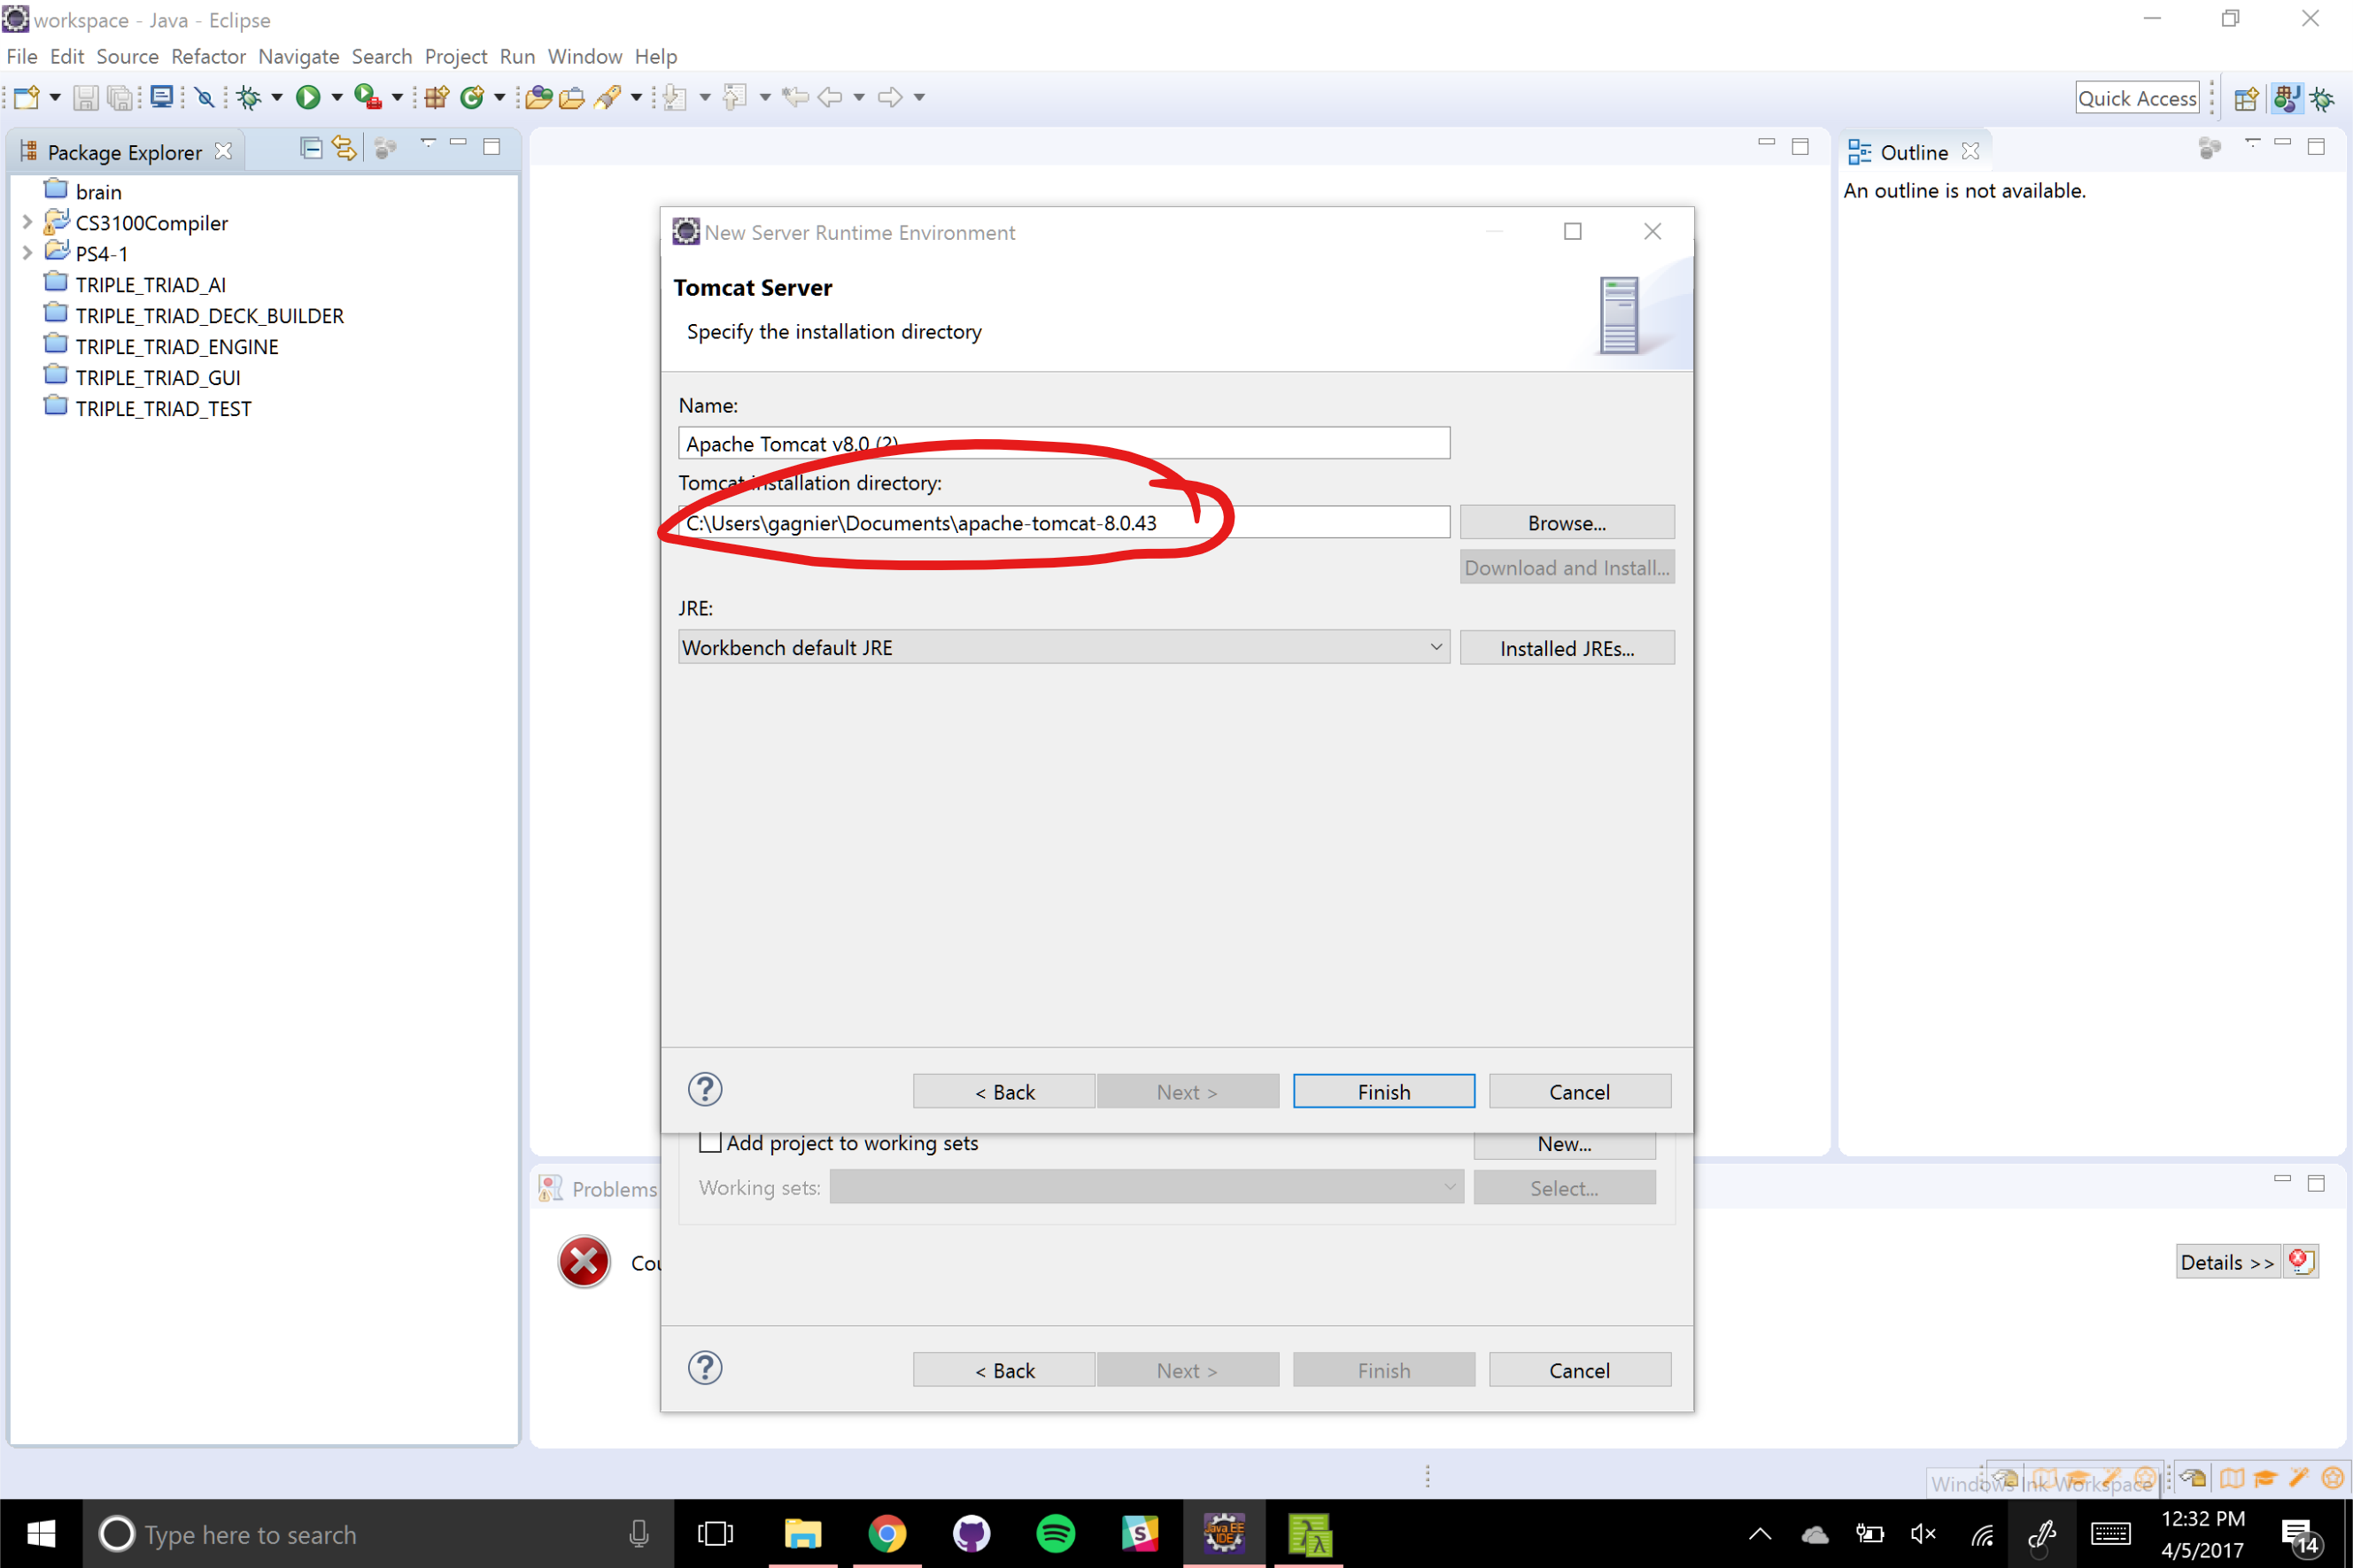
Navigate to the unzipped directory of your Tomcat download and input that directory.
After creating the new runtime, select that new runtime as the target runtime and click “Finish” to create the project.
Copy files into new project
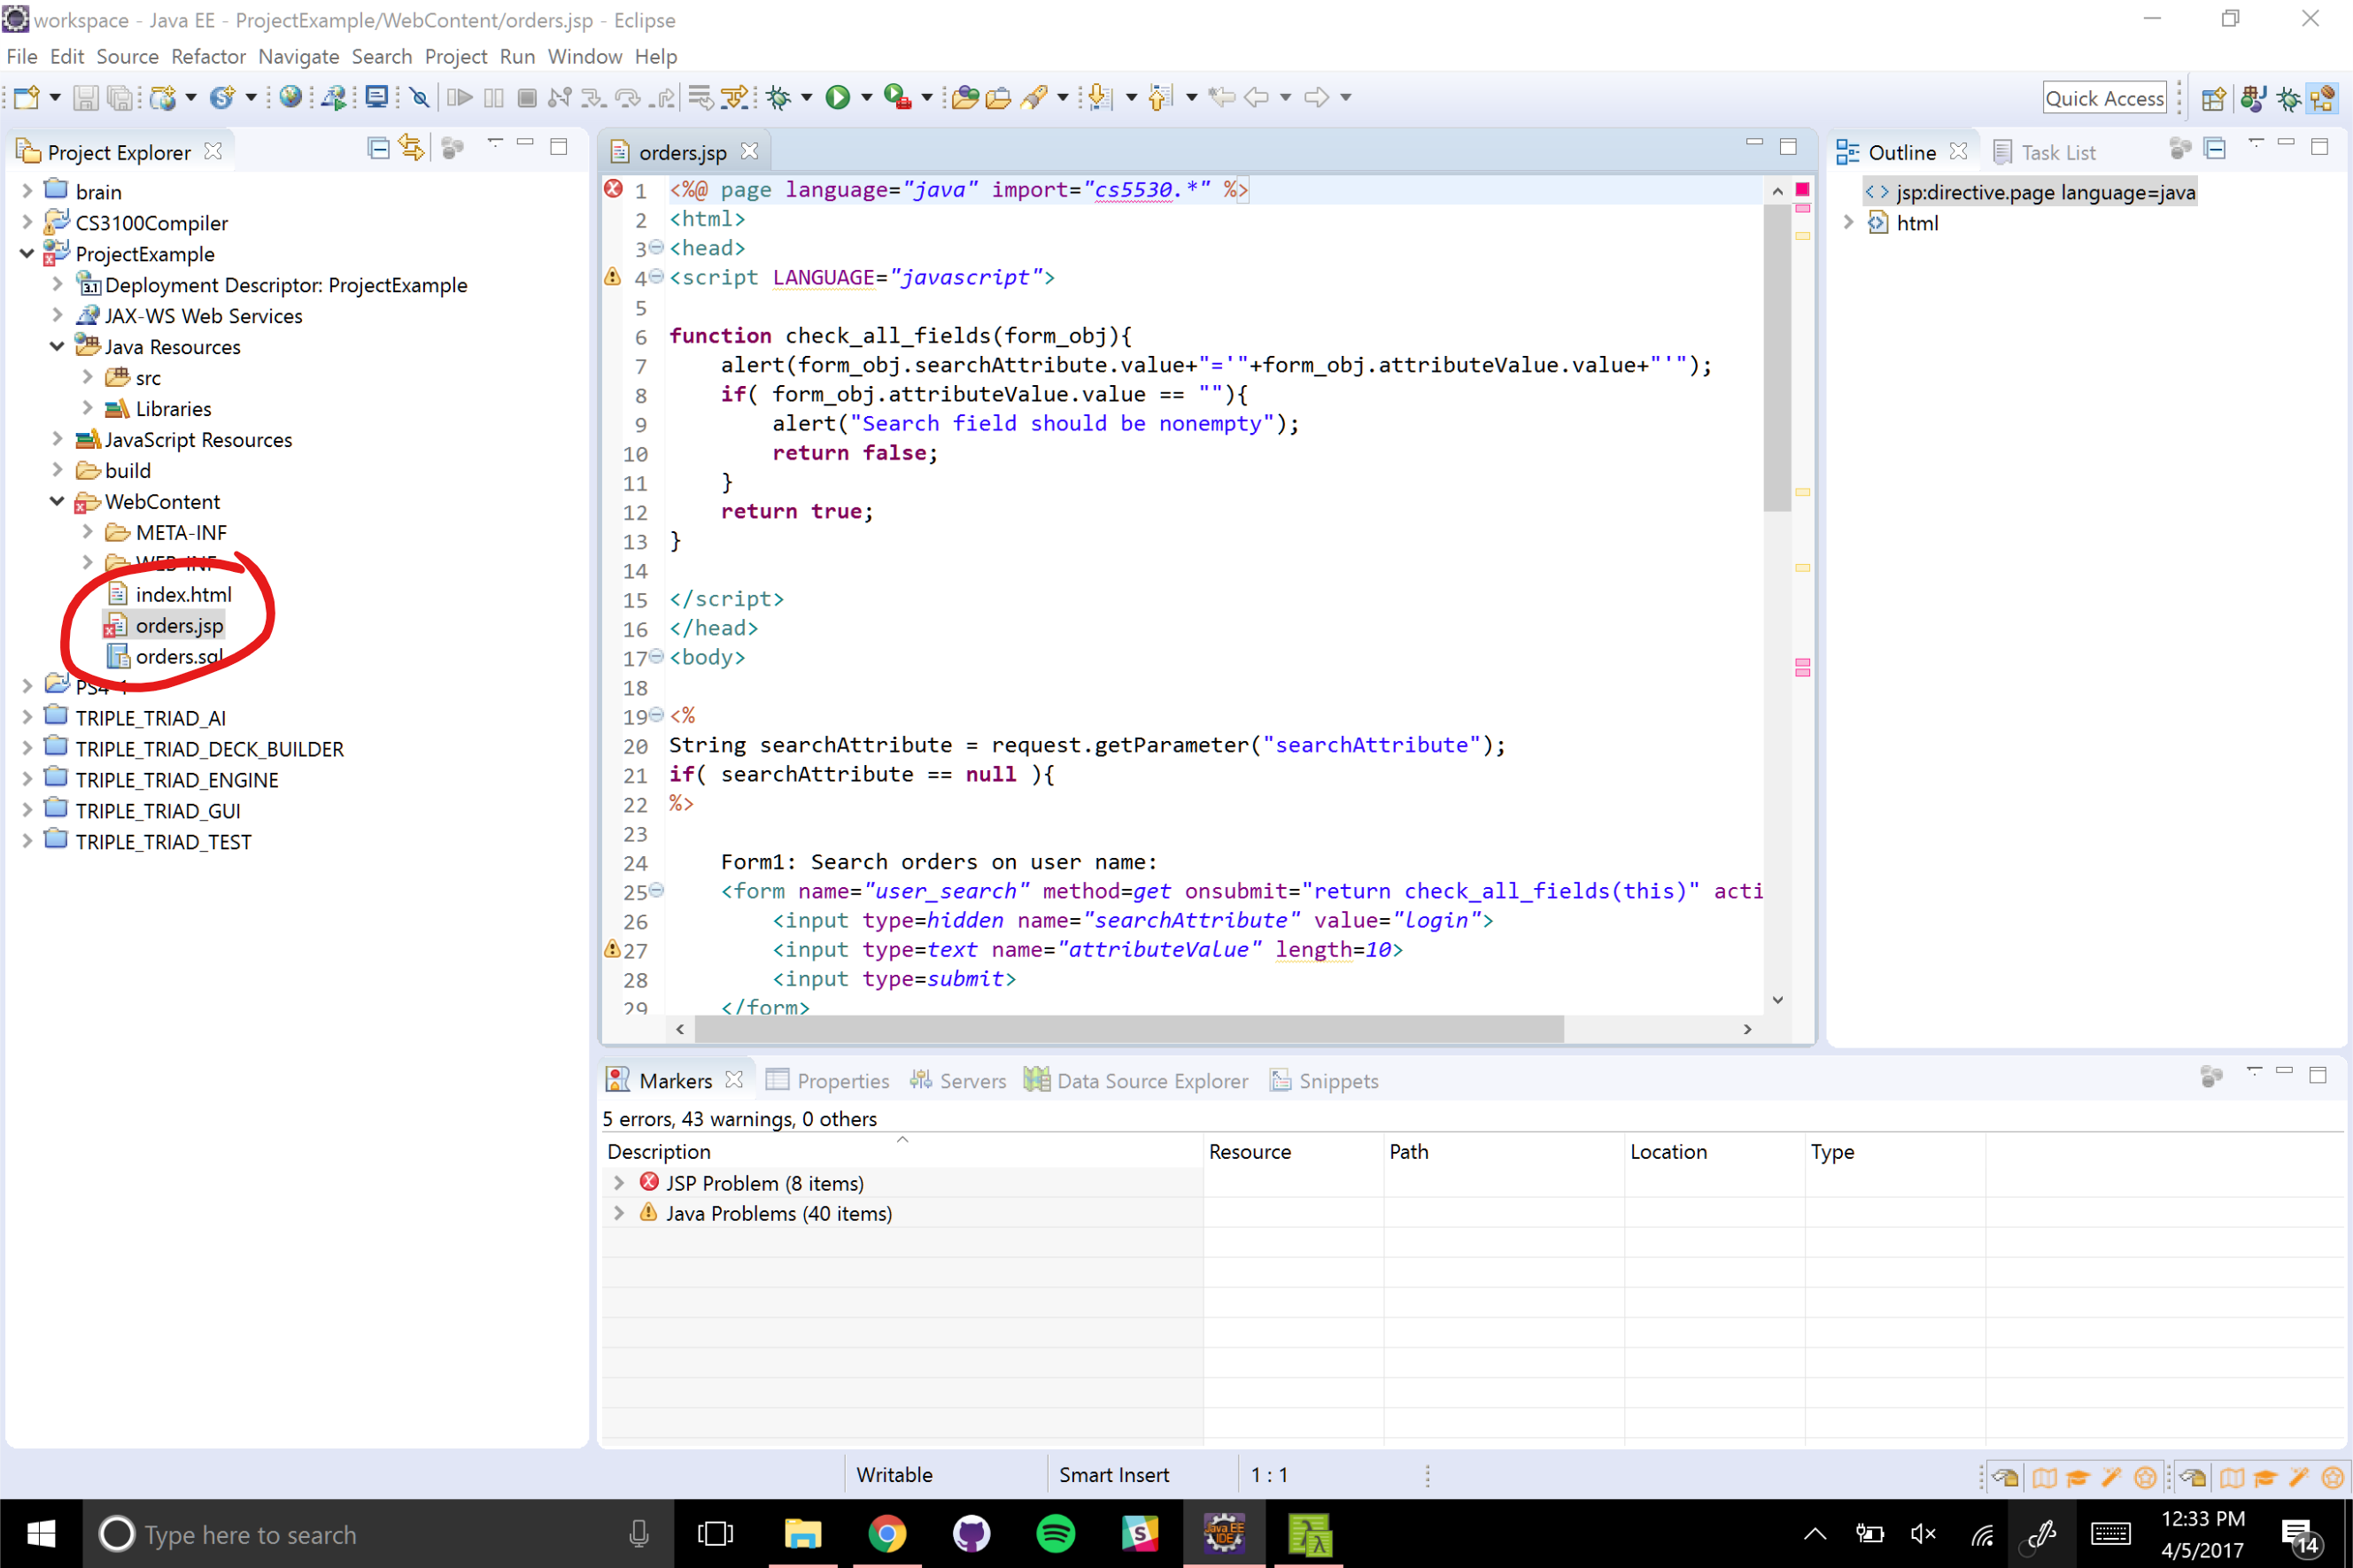
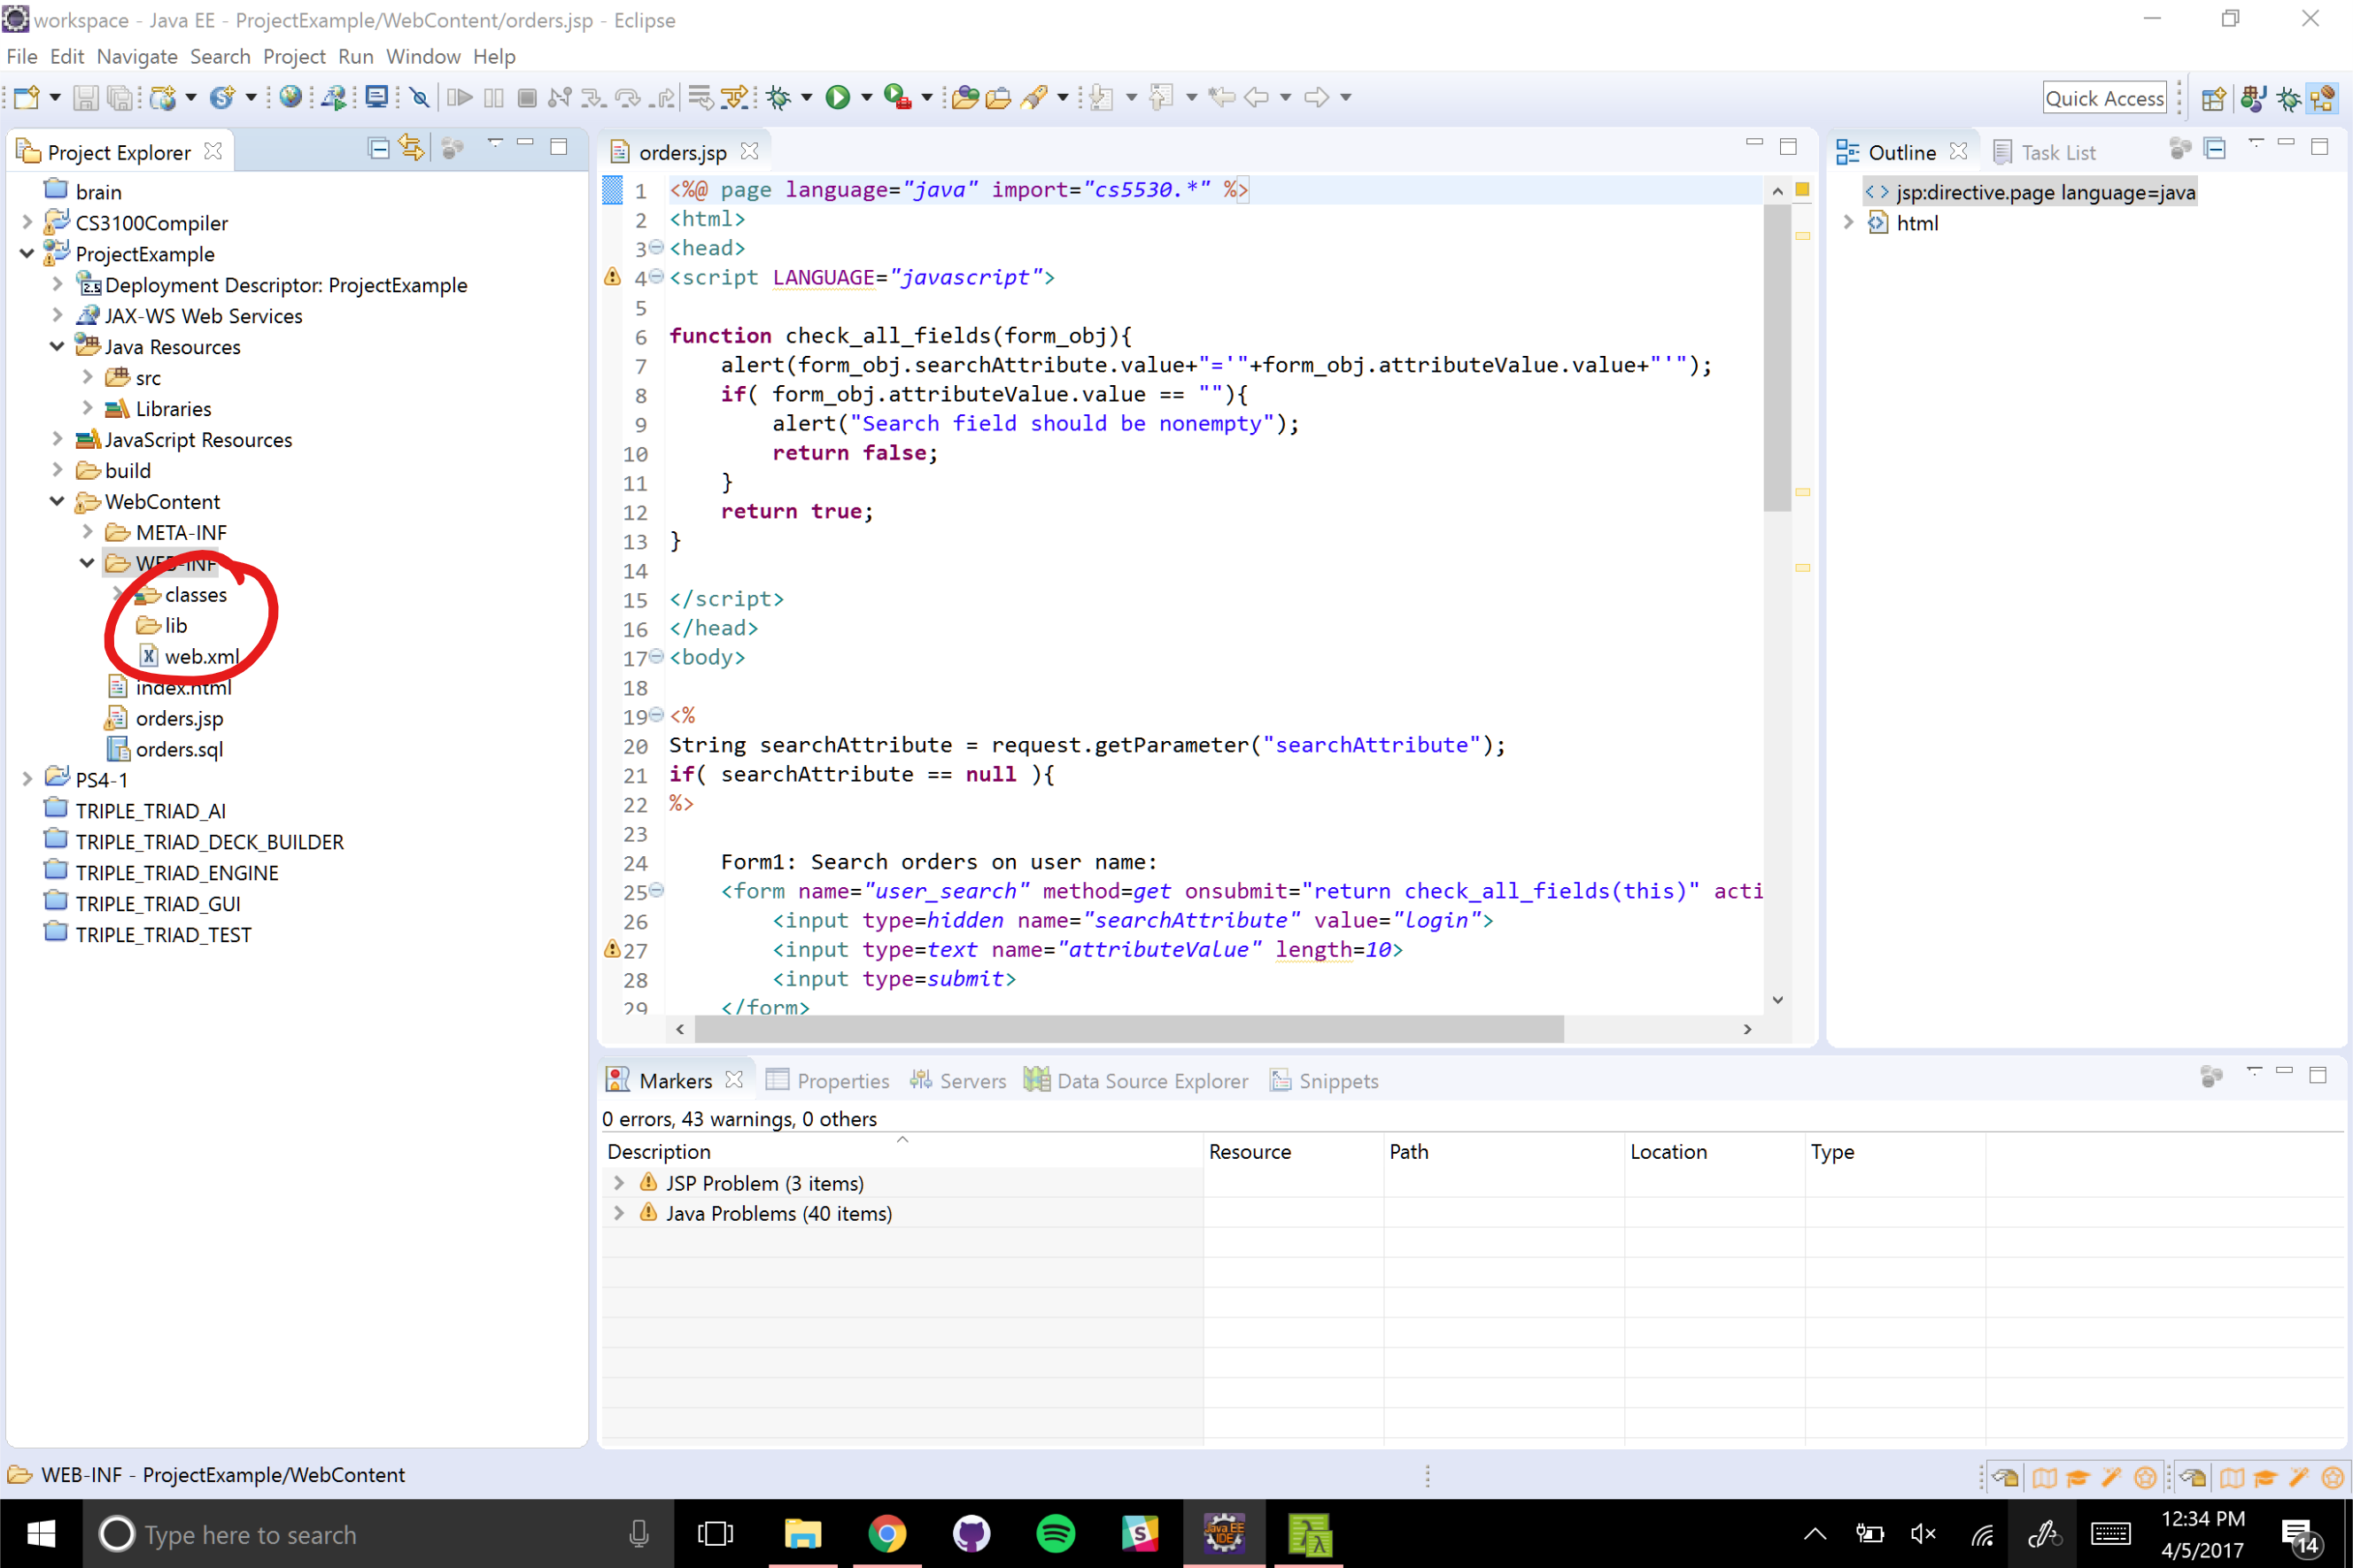
To utilize your existing work, copy your HTML and JSP files into /project/WebContent and copy the contents of WEB-INF into /project/WebContent/WEB-INF.
Starting the web server
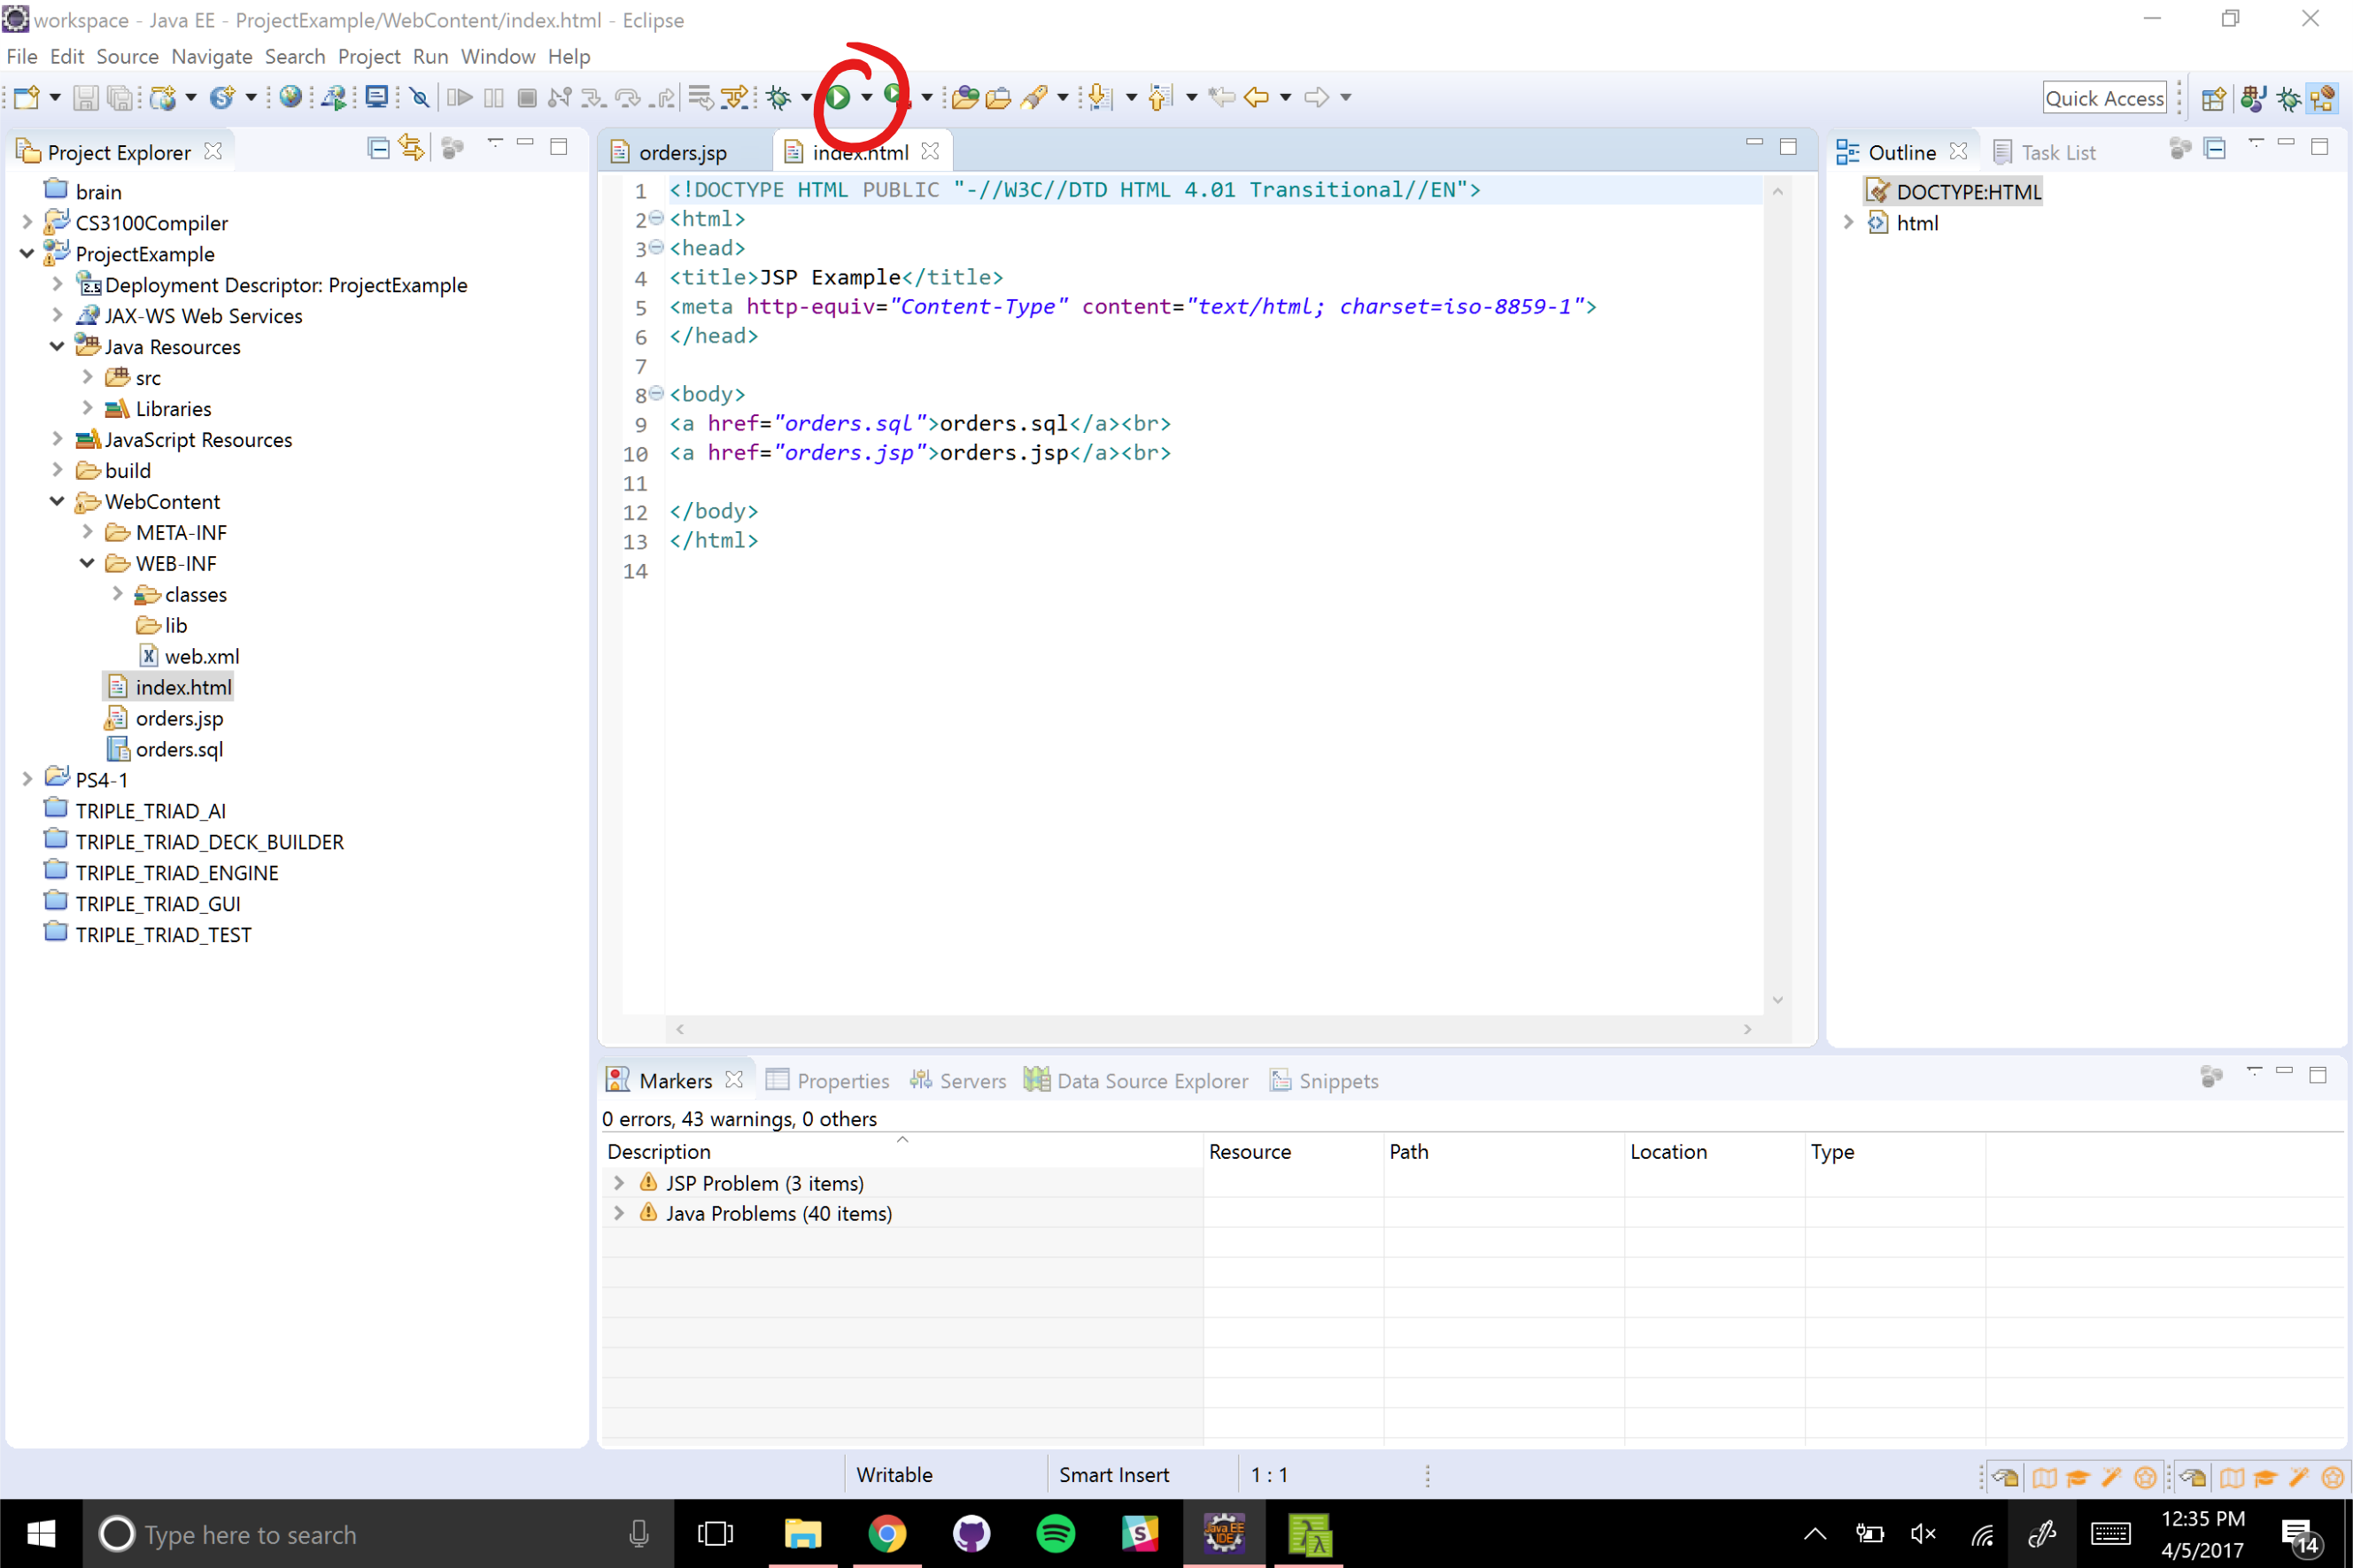
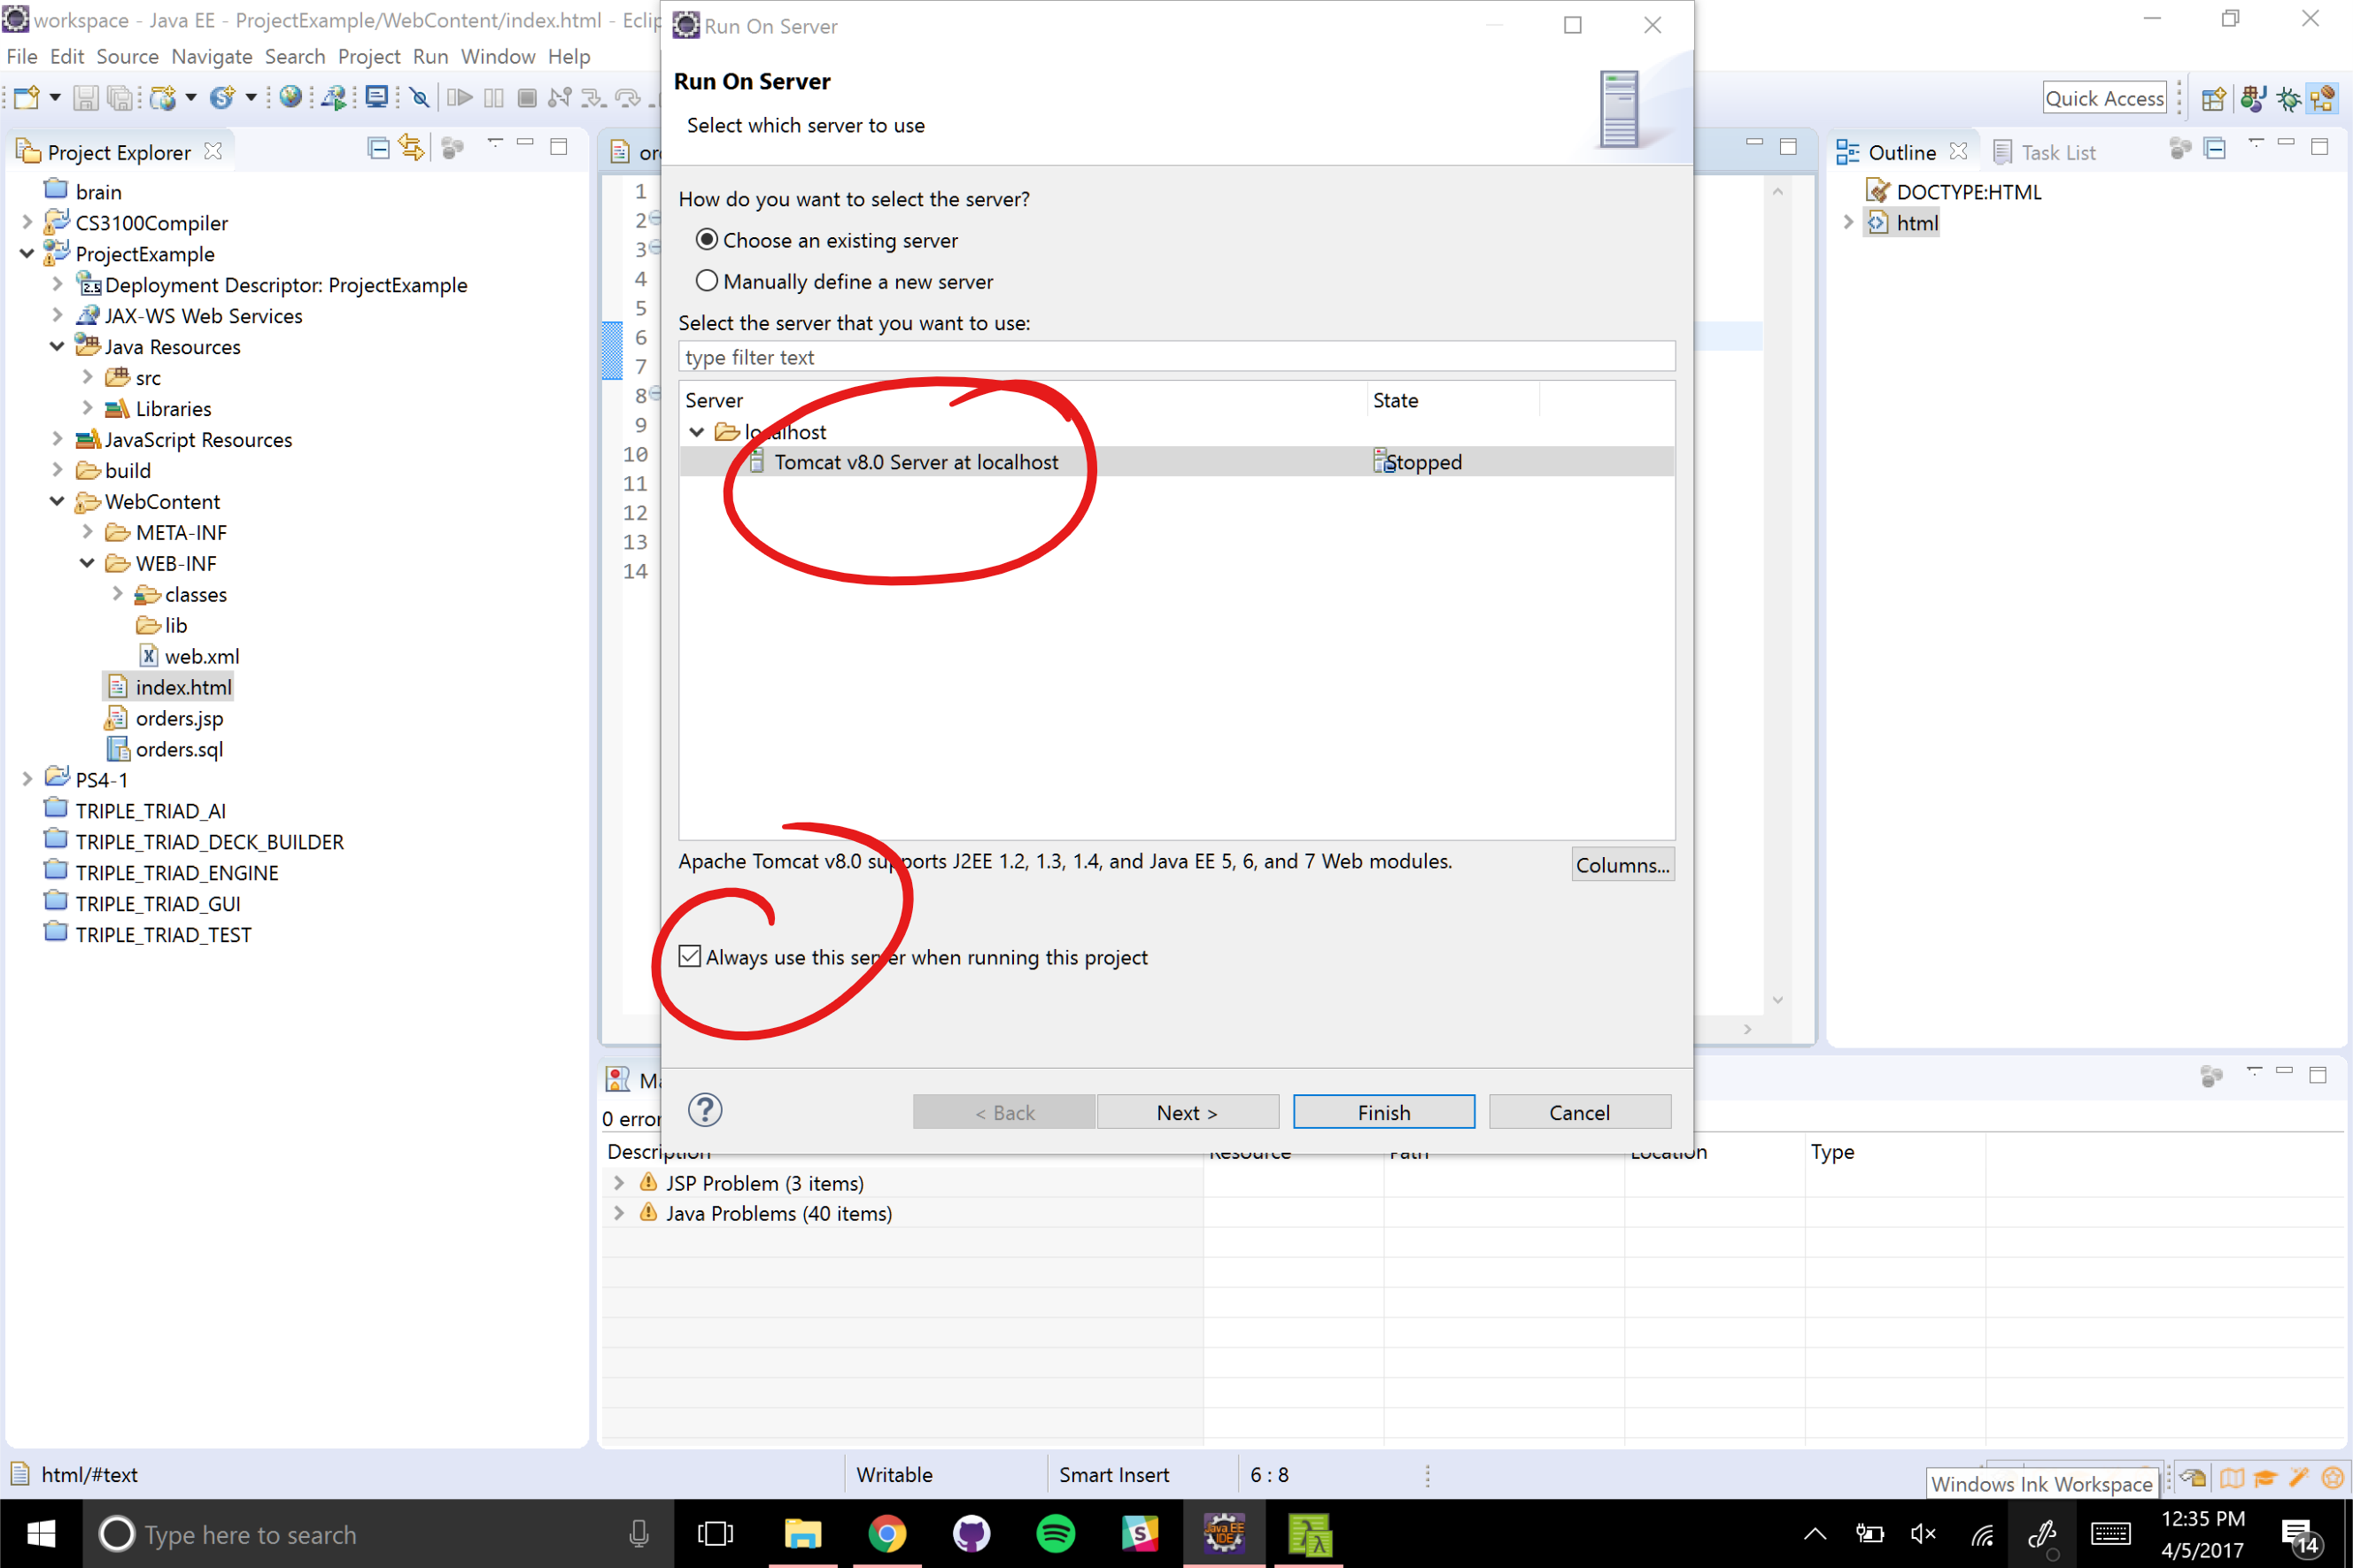
Just click run with an HTML/JSP file opened up from your new project. This will prompt you to select the server which you created. This should start up the web server on port 8080 and open up the web page in Eclipse (note that the URL will likely be prefixed with your project’s name).